22 Feb Tips for Sharing Ministry Space – Part 9: Final Thoughts & Our Future Space!
This post is part of a series on how to share environment space with other ministry teams. It might also be helpful for children’s ministry leaders that work in a portable setting.
- Intro – Share and Share Alike
- Before Decor – Plan Together
- Before Decor – Communication
- Before Decor – Creating Agreements
- Time for Decor – Think Portable
- Time for Decor – Hanging Stuff Up
- Time for Decor – Shared or Movable Backdrops
- Time for Decor – Portable Signage
- Final Thoughts & Our Future Space
One More Post
Originally, this series was only supposed to consist of 8 posts. But, we have something very exciting happening at my church! We are getting ready to move into a new building!
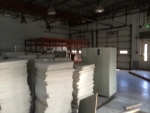
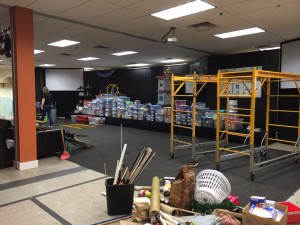 As you can see from the photo, we are packing and organizing and getting ready to move from the space we’ve leased for the last 8 years to a new space that we have purchased. As we have planned, designed, created, re-designed and come up with what we want our space to look like, I had to think through so much of what I’ve been writing about in this series. So, I thought I’d share a bit about what we are doing as we plan our new environment.
Permanent, But Still Shared
Our new space will be a permanent home for us, and we are privileged to customize it to our specific needs. You might think that after creating an environment through a “multi-purpose lens” for 8 years, we would want to design something specific to children where nothing would have to be put up or taken down again! That isn’t the case at all.
Our elementary environment will continue to be a multi-purpose environment, so we will still be creating semi-portable solutions for decor. This is intentional. Our experience in our leased space taught us the importance of having a multi-purpose environment. We enjoy the versatility and flexibility that this type of space offers. Multi-purpose space allows for many ministries within the church to utilize the space, which is helpful as we grow and want to add new initiatives, etc. In addition, we always have an environment that is available for events outside of our ministry departments (i.e. b-day parties, wedding receptions, etc.). With this in mind, we are putting all that we have learned during our creation of these semi-portable environments over the past 8 years, into practice as we design this new space.
Choices, Choices, Choices!
Color
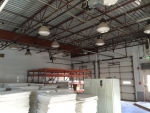
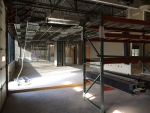
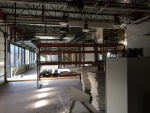
Our children’s space will be a transformed warehouse so it has a very industrial feel to it (exposed pipes, vaulted ceilings, garage doors, etc.). Our decor will be in keeping with this industrial vibe. While we’ll have a lot of gray and black color throughout, we knew we needed some pops of color to create the energy needed for a children’s space. One way we’ll achieve that is by using a brighter color paint on the walls of the space. Obviously, paint color is not portable or temporary, so the color was chosen by a team of ministry leaders that will utilize the space and our interior design consultant. We will also add color through the use of bright colored-circle carpets. These will sit on top of the main carpet in the environment and not only add color, but provide a space for each small group to meet. These carpet circles are germane to Children’s Ministry and will be “portable.” As such, that color choice was made by our children’s ministry leaders (we’re thinking they will all be ORANGE!). The main carpet in the environment (that the circles will sit on) is not portable, so again, it was chosen by a team of leaders. It will be a dark charcoal gray/black color (keeping it neutral).
Signage
We’ll have urban decor elements throughout. Lots of metals in our signage and possibly storage in colorful lockers. If we get lockers, they will be stationary. They don’t need to be portable because they fit the industrial/urban theme of the room as a whole. Our signage on the other hand, will continue to be portable. It will be hung in such a way that it can be removed it each week when children’s ministry is over. We are considering creating signage that has children’s ministry graphics (i.e.. basic truths, environment name, etc.) displayed on one side and student ministry’s graphics displayed on the other. If this happens, the signs will be hung in such a way that we can spin them based on what team is using the environment.
Focal Wall/Stage
As far as our focal wall – we’ll have a permanent stage that stands 16″ high, in front of our focal wall. Three screens will hang about 8-10 feet above the stage. Those are permanent fixtures and will not move or change. The space in between the stage and the screens however is where portable or multiple options will abound.
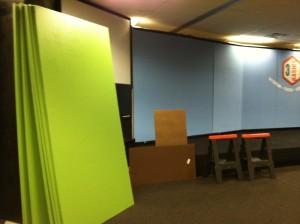 We learned so much in our current space about moving backdrops, that we are custom making our focal wall to incorporate four different options all within the span of about a 6 inch space from the wall. We will layer the options from most utilized (closest to the back wall) to least utilized (the front layer). Here is an idea of what our “layers” will look like:
- Layer 1 of our focal wall be a cinderblock wall that we paint gray and distress to expose the cinderblock.
- Layer 2 of our focal wall will be a track (similar to what we use currently) that will house our children’s ministry backdrop for the month.
- Layer 3 of our focal wall will be a second track hung in front of the first. This will house the student minstry backdrop. While children’s ministry and student ministry use the same space, student ministry does not meet as often as children’s. They also have one static backdrop, so they will slide their backdrop in and out each time they use the space.
- Layer 4 will be a black curtain that will hang in front of all three of the above-mentioned layers. Most of the time, it will be gathered at one end of the stage and concealed by other elements of our set design/props. It will be available however, if at anytime we cannot remove a backdrop or feel like creating a more simplistic backdrop. All we’ll need to do is pull this curtain across the stage and we can conceal whatever is behind it!
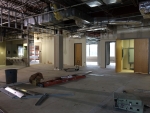
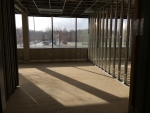
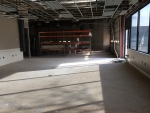
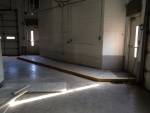
As we create pieces of our new space, I’ll be sure to post photos, but for now here are some preliminary pictures of our future environment.
Final Thoughts
As mentioned several times throughout this series of posts, creating irresistible environments in a shared space takes a little extra thinking and planning. But if you do the work up front and get certain systems in place, you’ll be able to create an environment that serves the needs of your ministry – but can be removed quickly, making it ready for other ministries to come in and do the same.
It is tempting to let decor and the creation of the physical environment slack when you share ministry space. When we brainstorm as a team about what our stage or environment will look like for each month’s theme, I often have to stop myself from thinking – “Wow, that will be hard to move back and forth each week,” or “We can’t do that – it’s too much work to have to take it down each Sunday.” Instead, I remind myself to be quiet, let the brainstorm happen and then go back in and think “How can we take these amazing ideas that we came up with and make them portable!?” That is always a better question. I urge you to ask it!
Don’t let sharing ministry space stop you from creating irresistible environments. It will be worth every bit of work you put into your portable solutions as you see kids engage and watch their faces light up. It will be worth it as you begin to hear the stories their parents share about how they do not want to miss church and you watch them wait outside the door of your environment to be the first one in! Irresistible environments are a must in children’s ministry – even if they have to be portable!
So…GO FOR IT! Get READY! Get SET! Get PORTABLE if you have to… ’cause it’s almost SUNDAY!


