


20 Jan How to Hang It Up!
We hang things from the ceiling and walls to add additional layers of decor to our environment and enhance our monthly theme. Because we share our space with other ministries in our church, we have to remove anything hanging on a weekly basis. That can be tedious, but here are a few ways we’ve tried to make the process a bit easier.
Hanging Things from the Ceiling
We use Command Hooks wherever we want to hang something from the ceiling. Our environment has a drop tile ceiling, so we place them on the ceiling tile grid. We chose this type of hook because the hook itself is not stationary. The hook swivels, making it is easier to hang things with a high reach pole. In addition, this particular type of hook is inconspicuous and gives a clean look because the white or clear adhesive part is not seen against a white drop tile ceiling. After placing the hook on the ceiling tile grid, we loop whatever we are using to hang decor (ribbon, fishing line, rope etc.) through a binder ring. The binder ring is sturdier then a ribbon or fishing line and makes it easier to hang things up and take them down. Once we have everything ready to hang, we use our high reach pole to hook the binder ring to the hook on the ceiling.
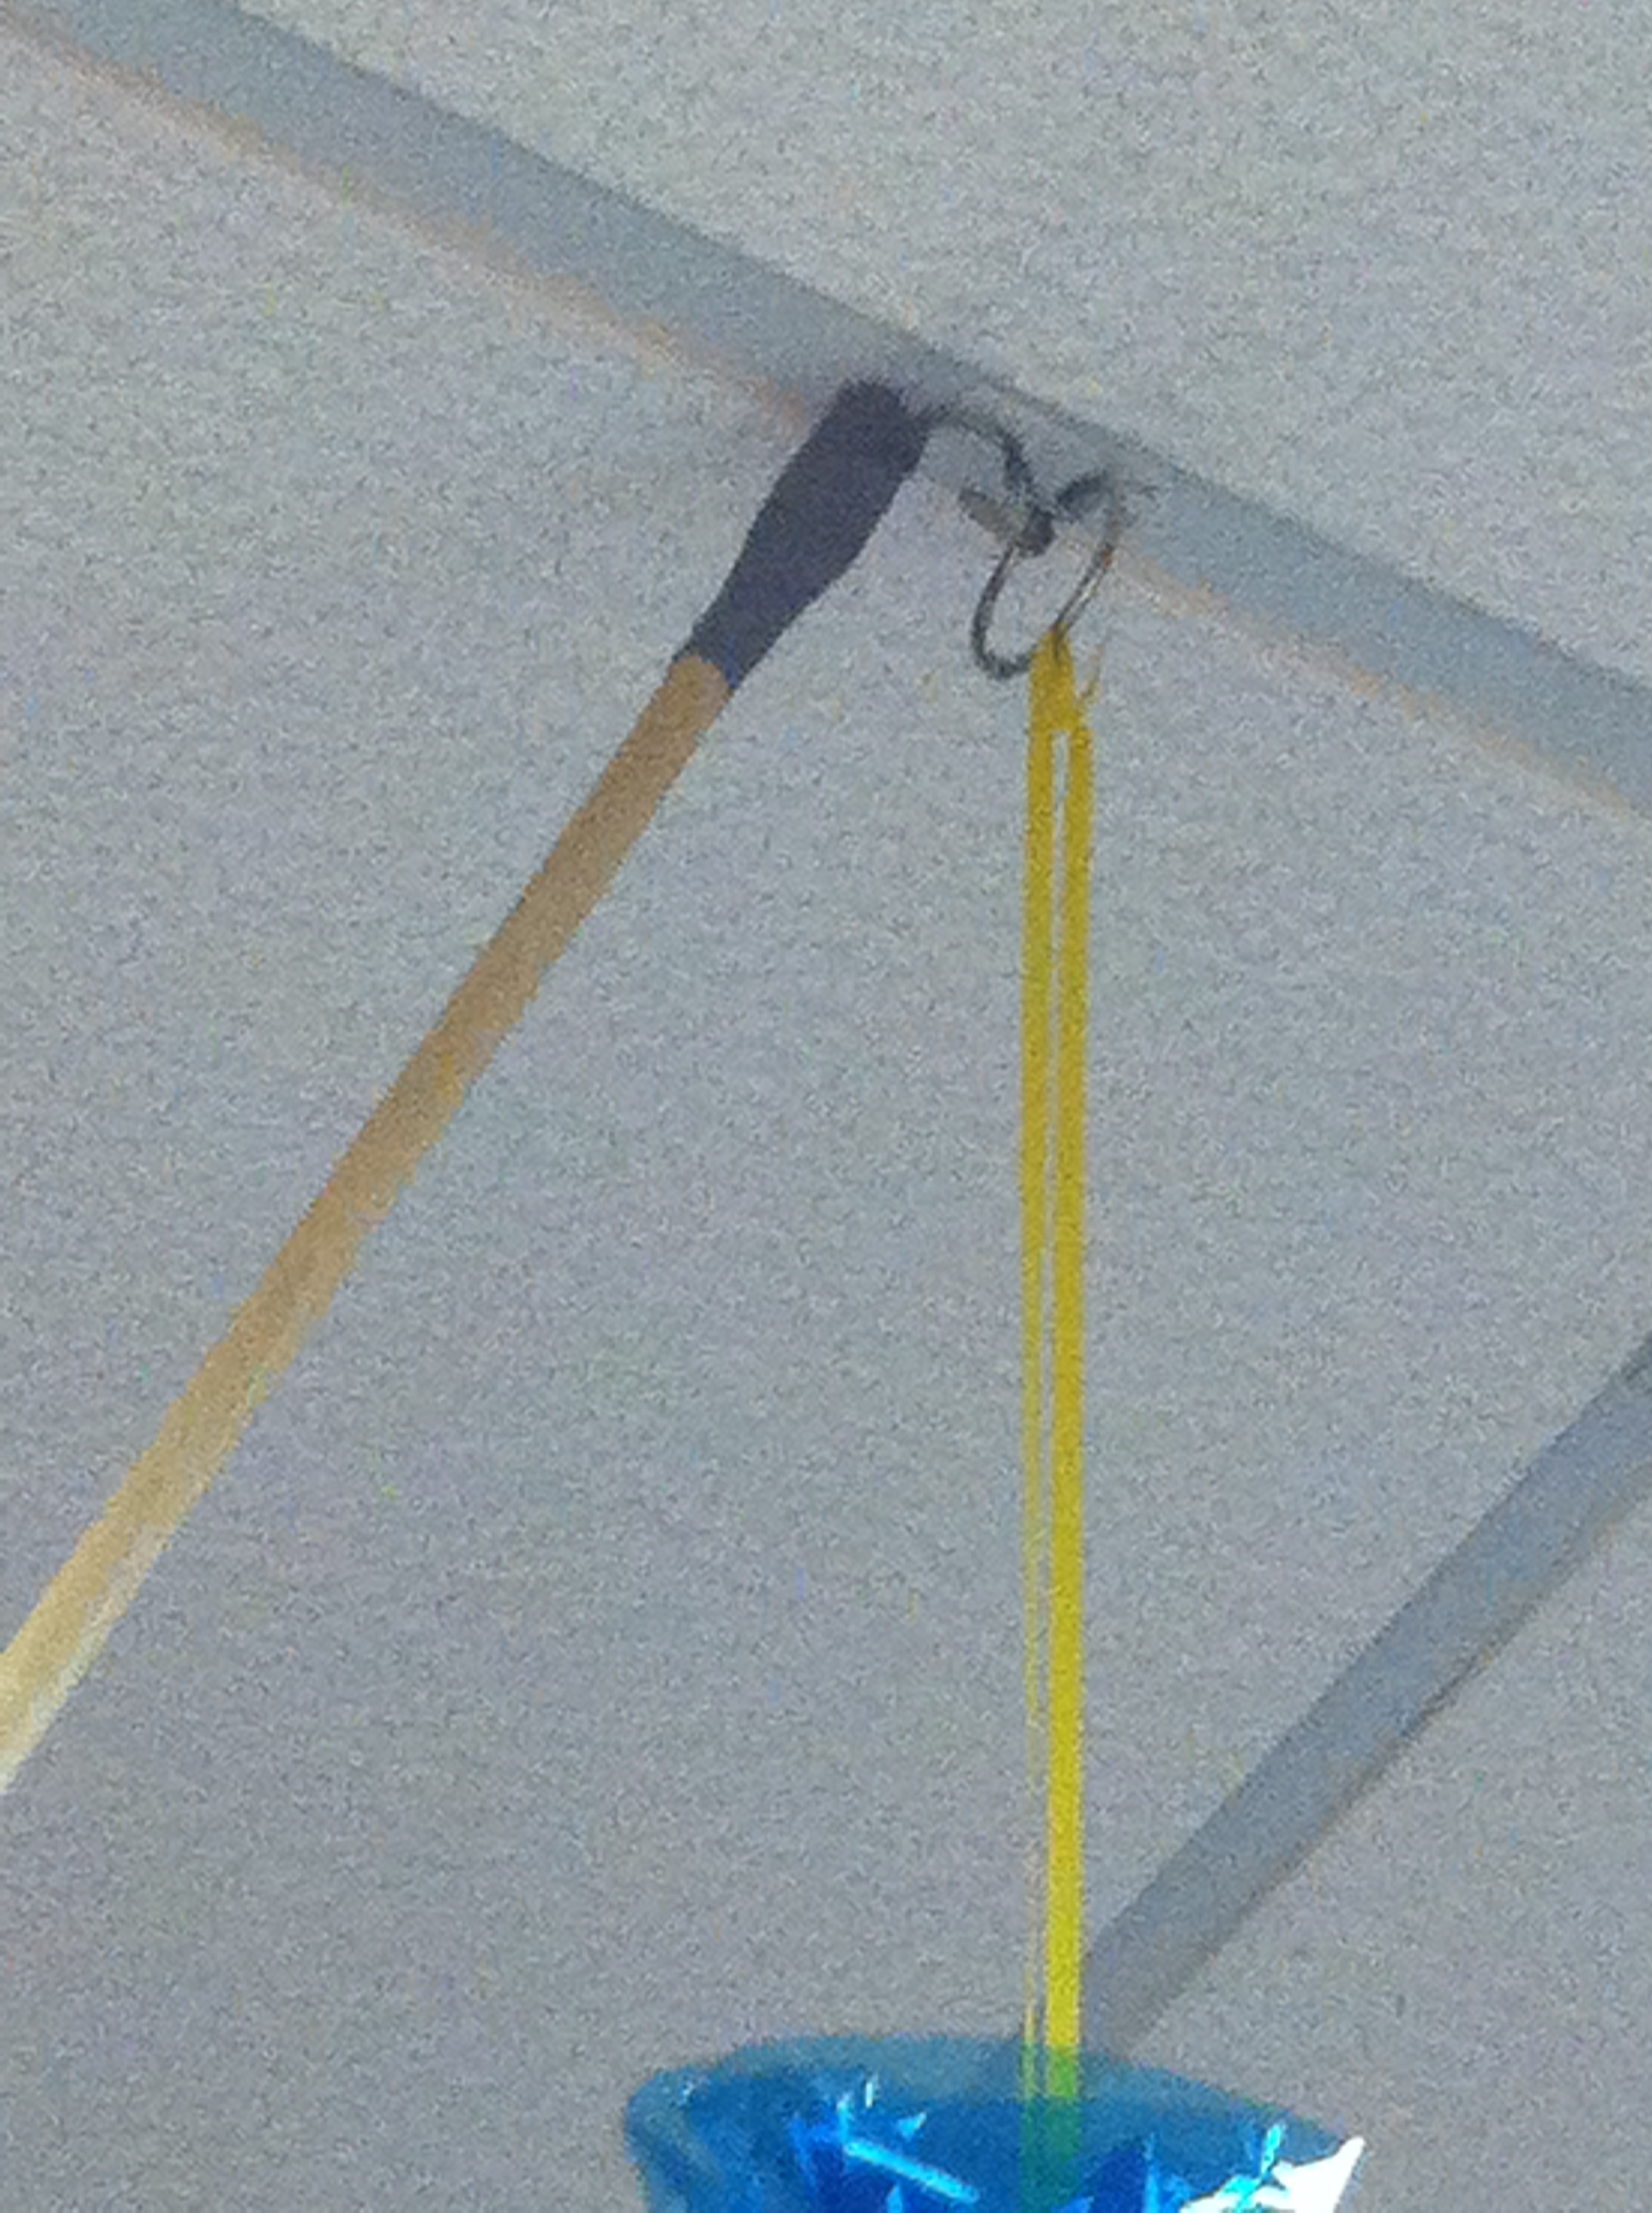
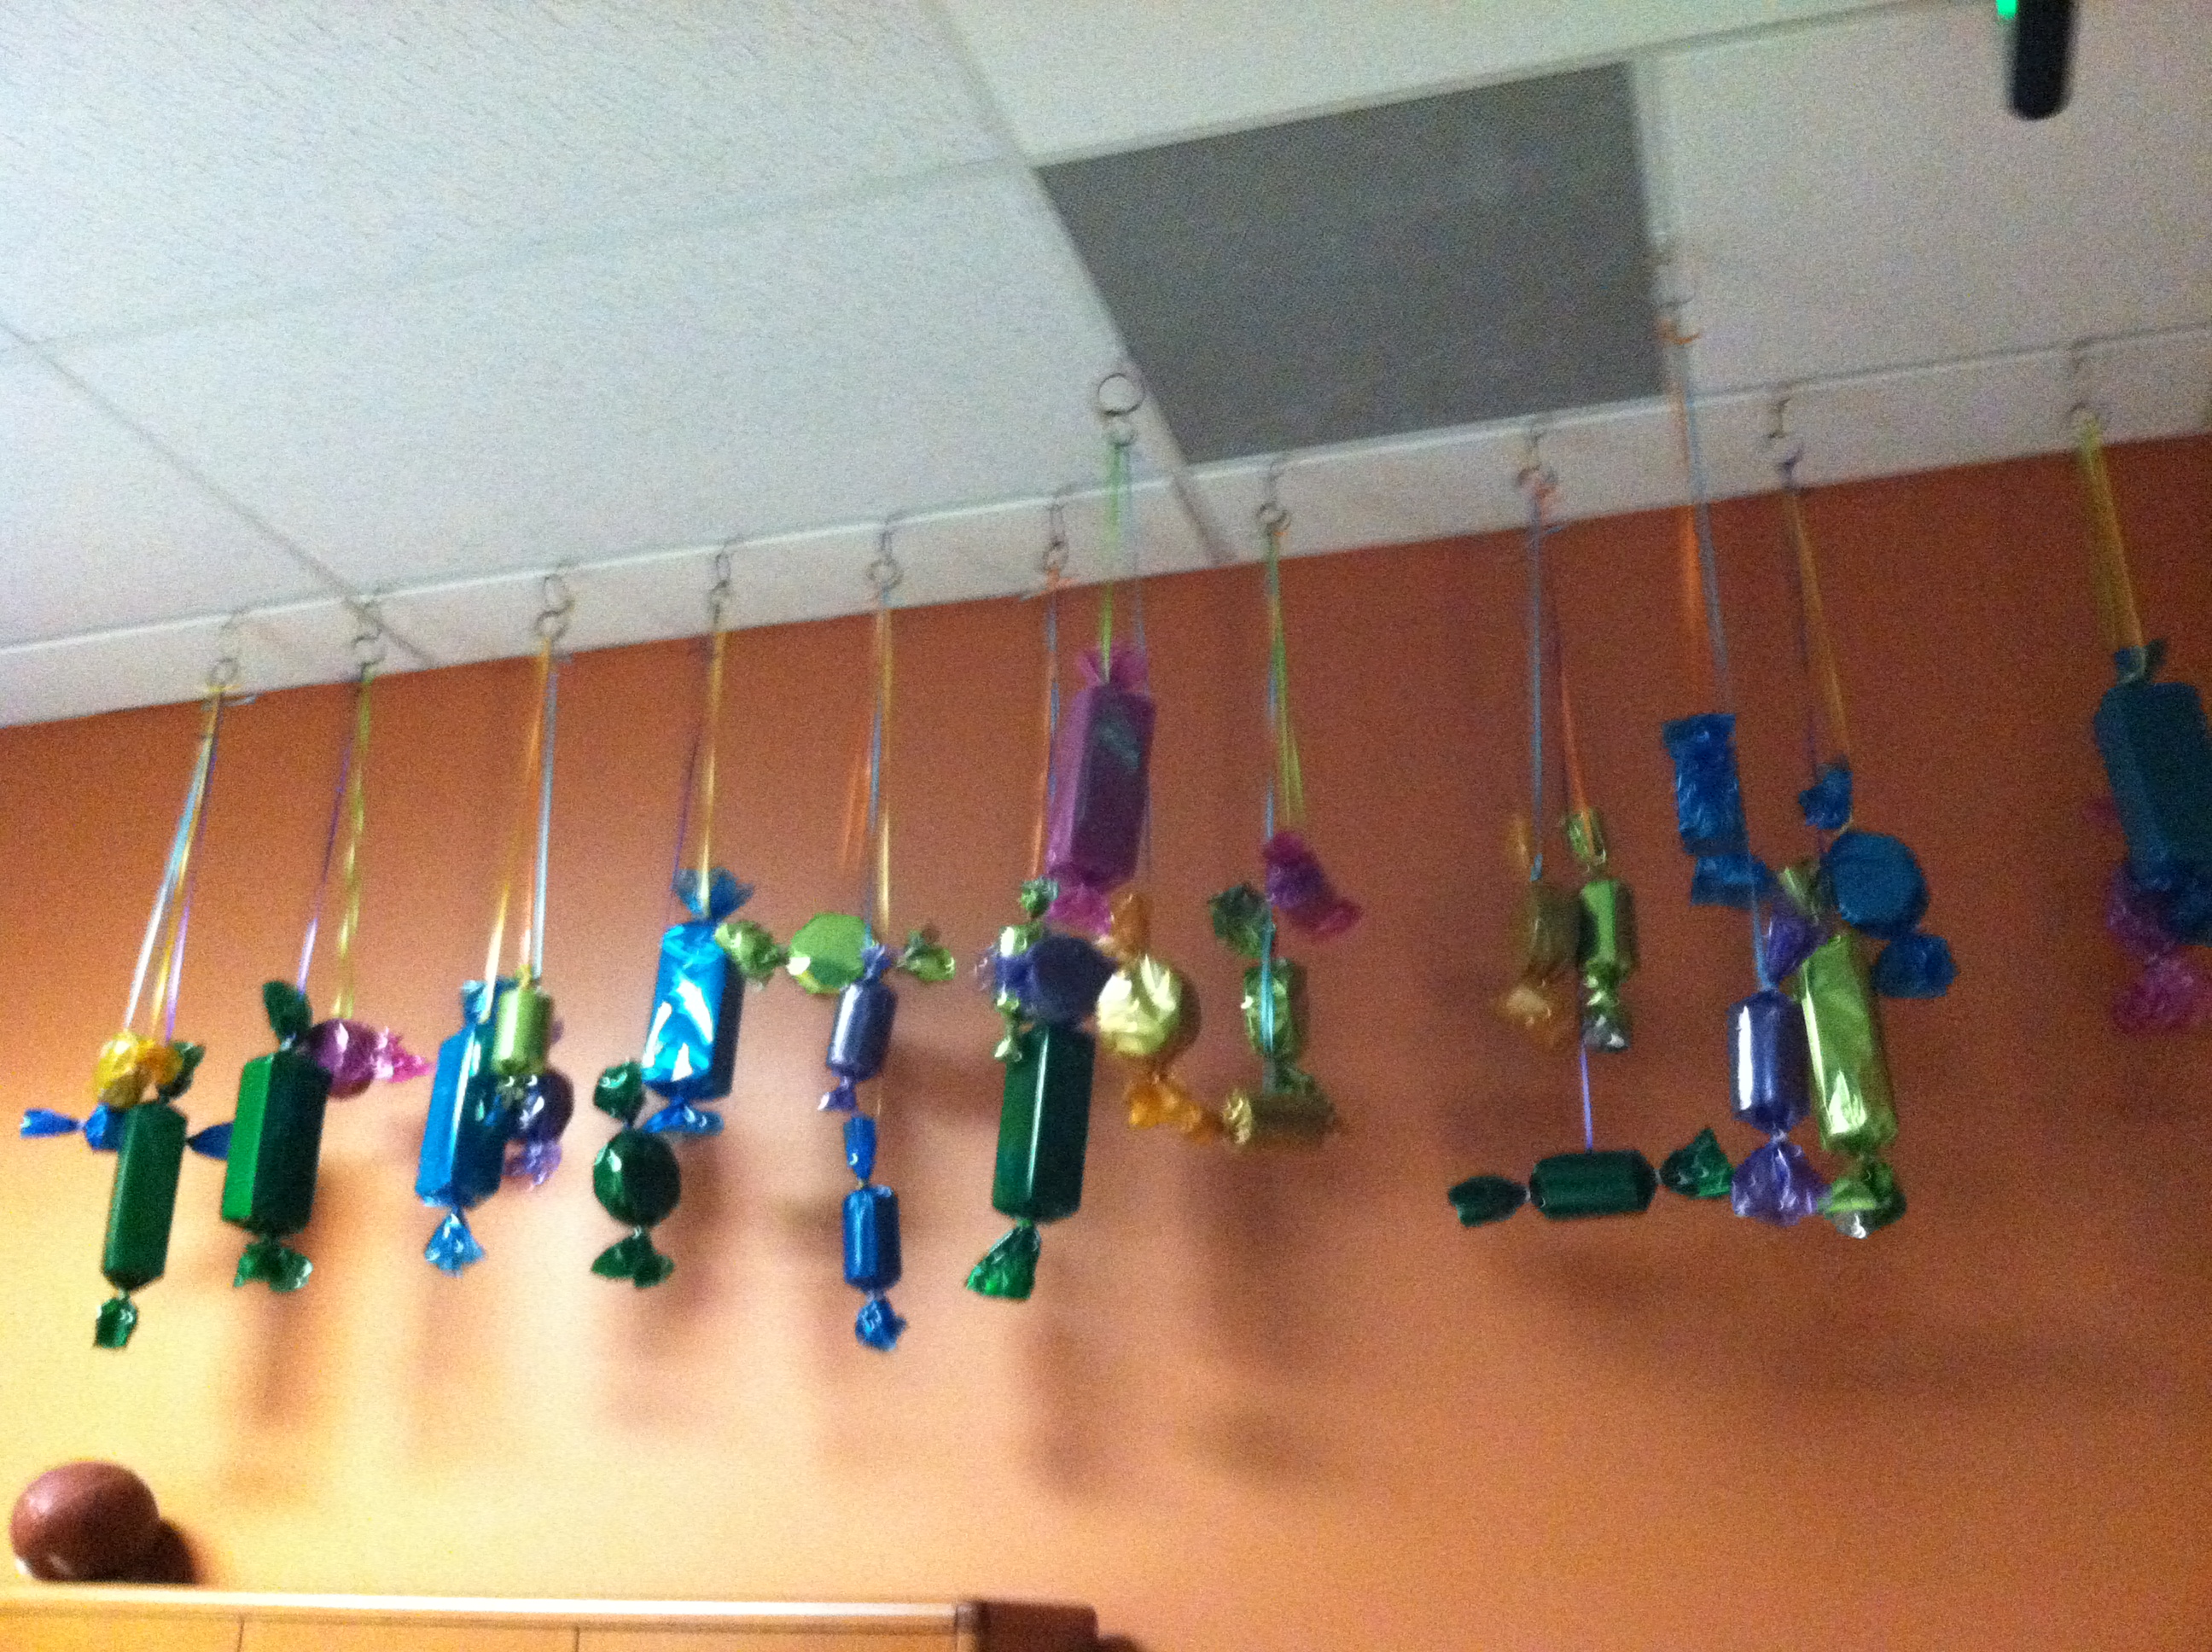
We take things down the same way (with the high reach pole). We have a space behind our stage with several Command Hooks attached to the ceiling. This is where we hang/store the decor throughout the week. We keep things hanging (rather than piling them backstage or storing them in a bin) to avoid tangling – a lesson we learned the hard way! Here is an example of that:
Hanging Things From the Wall
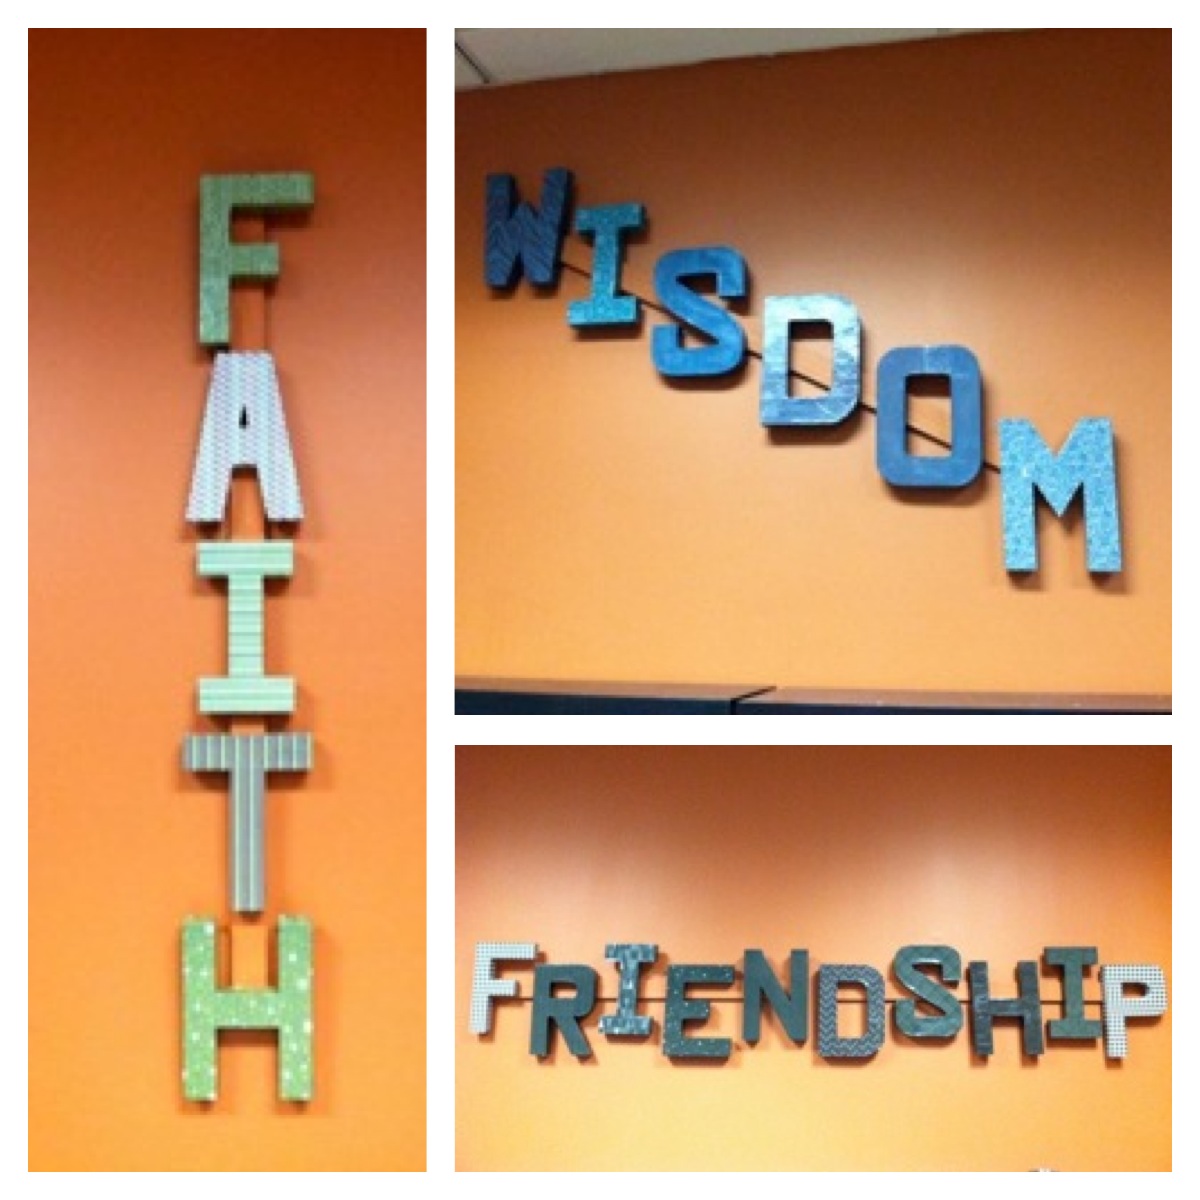
Last year, we re-tooled our children’s environment space and we wanted to hang the words Faith, Wisdom, and Friendship in 3-D letters on the walls of the environment. We knew that we could not hang individual letters because we would have to remove them all each week. Instead, we decided to mount the letters on a piece of board that we painted the same color as the wall color. We put eye hooks in the top of the board and then put small picture hangers on the wall where we wanted the boards. This enabled us to lift the boards on and off the picture hanger each week and only leave a small inconspicuous picture hanger behind. You can even paint the picture hanger the same color as the wall to make it even more inconspicuous.
We also utilize magnetic boards that can be shared with other ministries if they choose. Because everything is hung with magnets, it is easy to hang things up and down each week.
If you are unable to hang things on the walls of your space, consider creating “portable walls” with insulation foam or plywood. You would have to configure a way to prop them up or build a stand to help the foam or plywood stand freely. HINT – Think about the way a picture frame sits on a desk and then think – oversized!
We love insulation foam because you can hang things and take them down easily with T-pins. This allows you to move things around or change what is hanging each week, without compromising what you have designed/painted on your insulation foam wall.
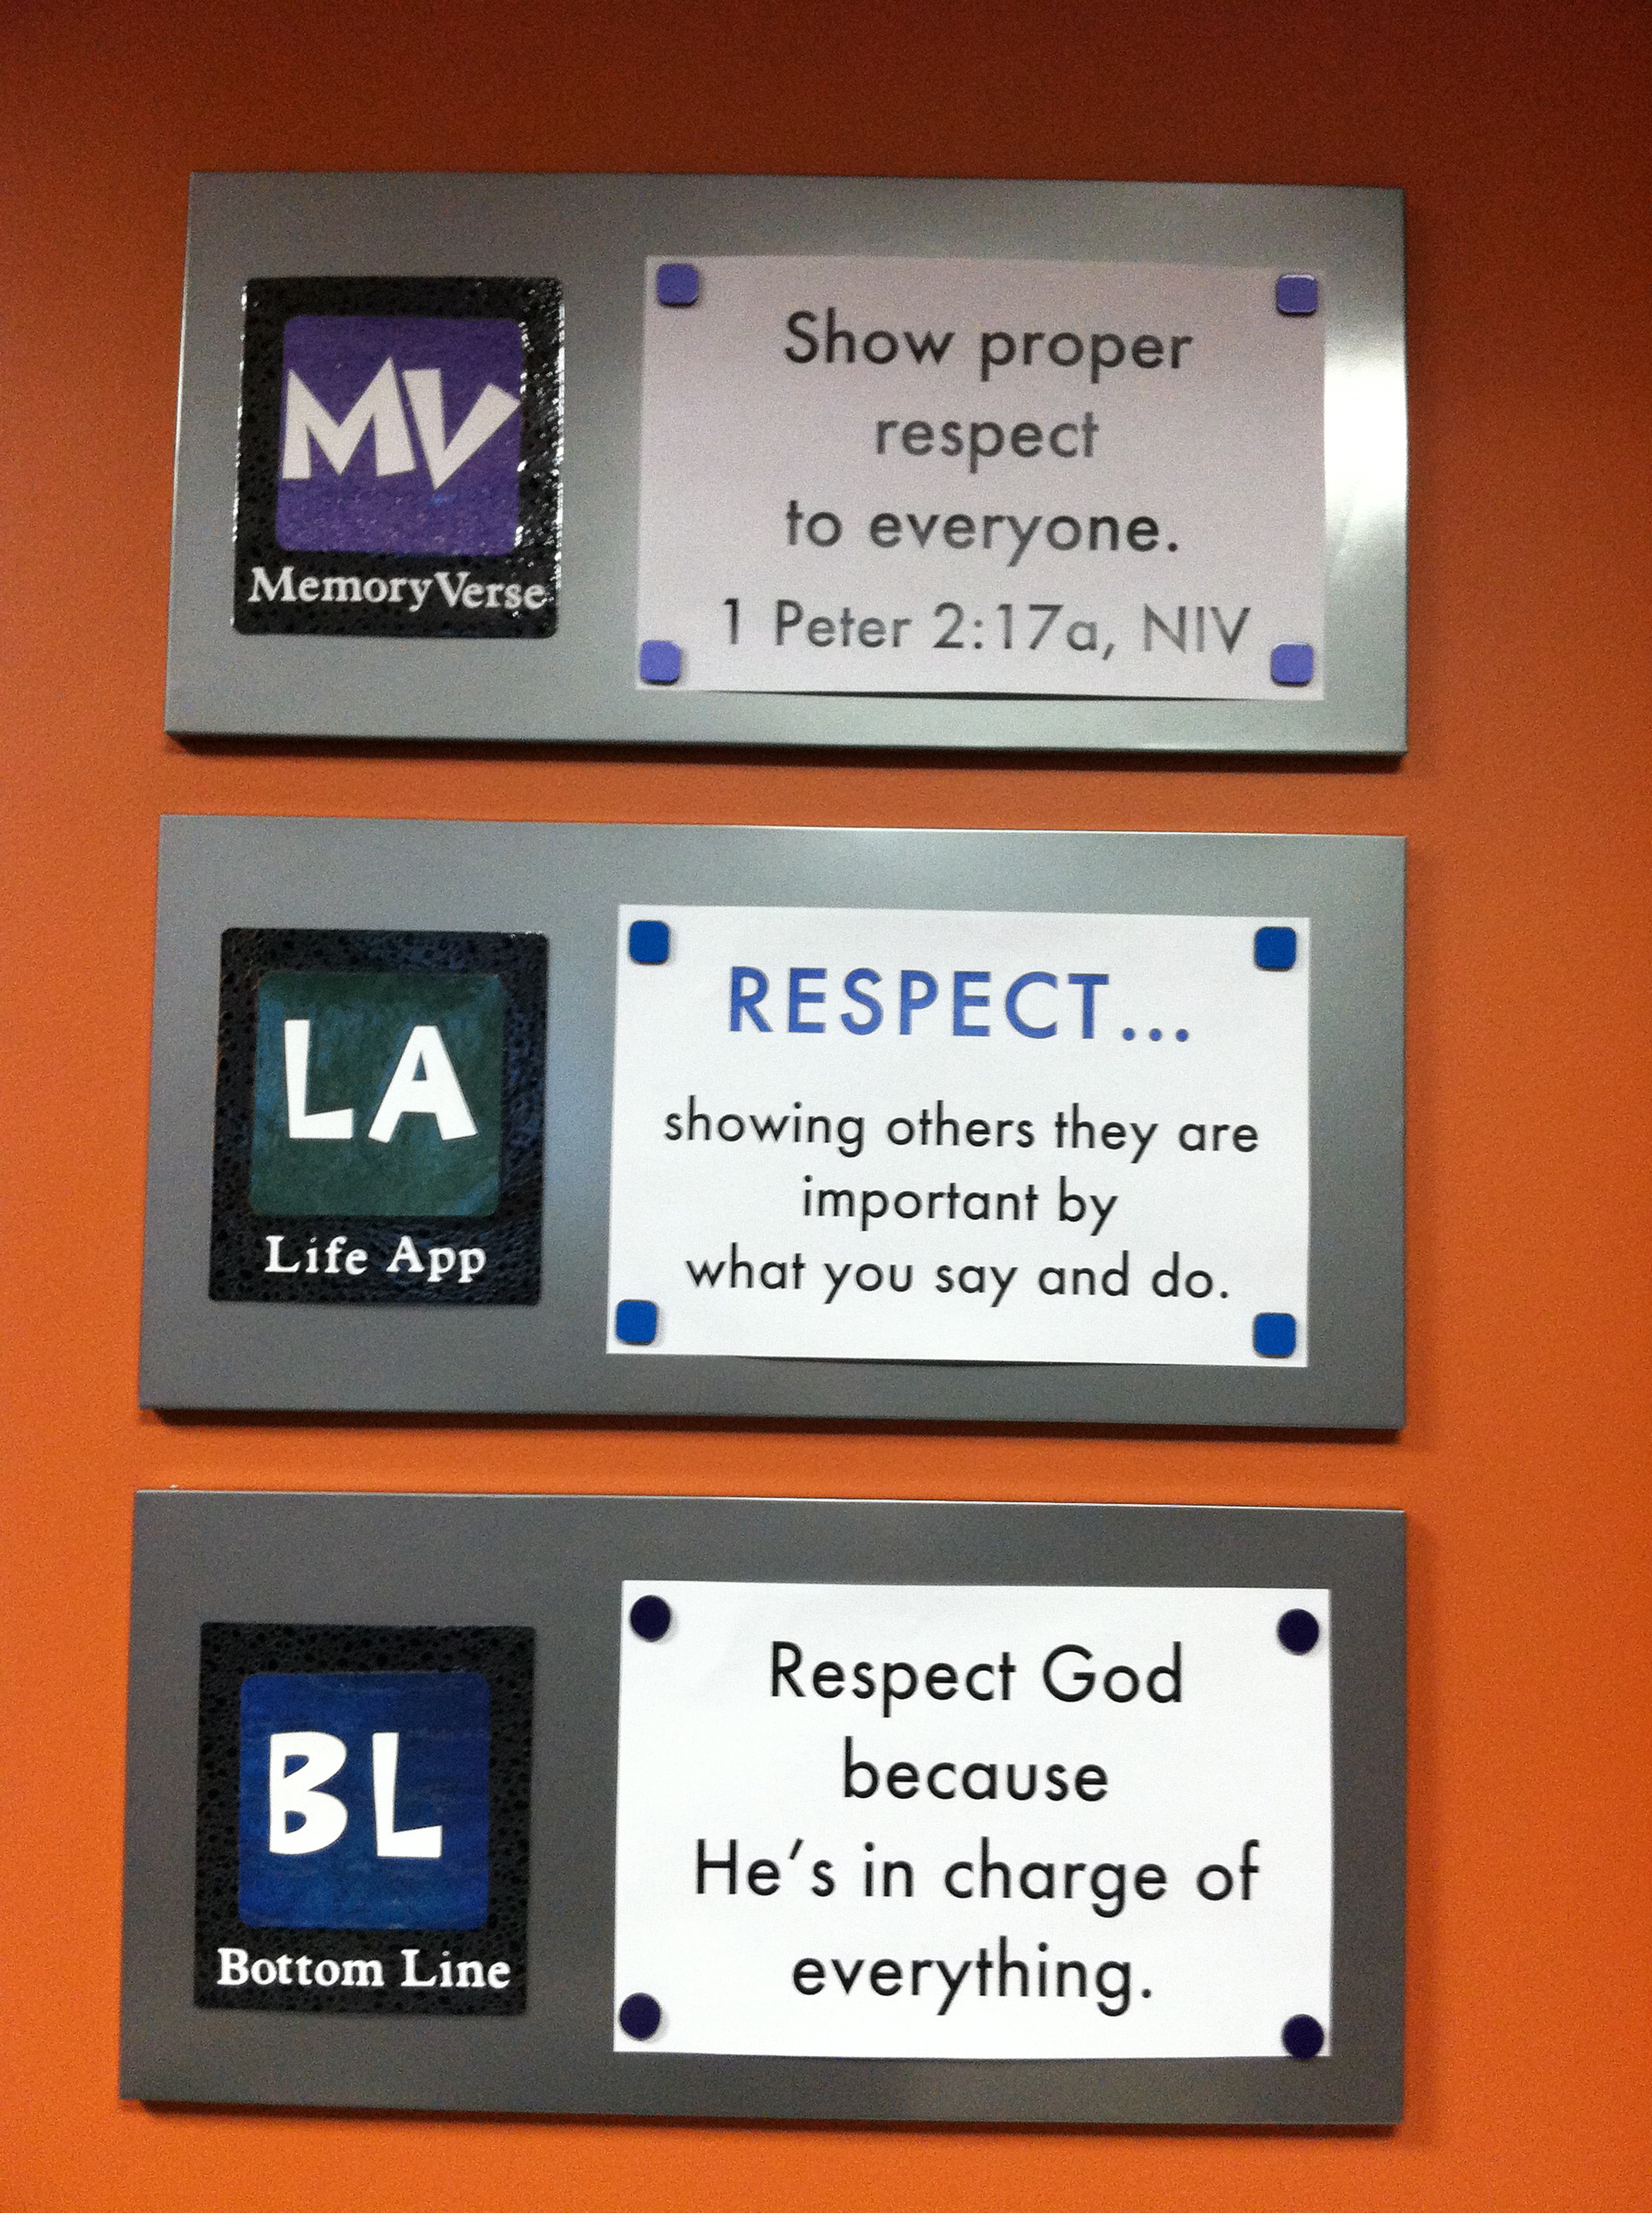
Sometimes decor can be as simple as displaying what is being taught each week in a colorful, fun way. Use the poster images from 252 Basics Large Group Visuals to create signage for bottom lines, memory verses, or Life App definitions. Then display them on easels created out of plywood and chalkboard paint. Or if you can’t create your own easels, purchase magnetic white boards that prop against free standing easels and hang the poster images from it each week with magnets. This will allow you to change them often without changing the entire display.
What systems have you created for hanging and removing things easily from your environment?
