25 Apr Summer XP: Chase the Light
Summer Series: Chase the Light
Theme: Chase the Light – Following Jesus, the Light of the World
Date: Summer, 2010
This post is one of several to come about Summer XP’s. Next week, I will begin a series about how we implement Summer curriculum at our church (specifically the Summer XP’s provided by Orange). This series will include individual posts about the Summer XP’s that we have already completed (Live It Out, Chase the Light, Jump, and Zapped), as well as practical helps for recruiting a summer team, how to schedule summer volunteers, and more. I am posting about ‘Chase the Light’ in advance of the series because I thought the lighting component might be helpful for May’s Endurance theme, which had suggestions for lightbulbs and lighting decor.
Our Set
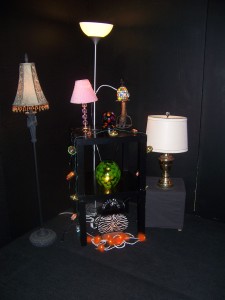 Chase the Light was our summer series for July and August in 2010.
We knew we wanted to have lots of lights everywhere, so we began the entire decorating process by asking people in our church to lend us whatever type of lighting they had (and would be willing to spare for the summer). We asked for table lamps, floor lamps, string lights, lanterns – anything that would give us cool lighting options.
As we collected the lighting elements, we began to think through how we could use it all for our stage and environment design. At the time of this series, we had an 8′ x 4′ black dry-erase board that we used for our monthly FX. Since we were not going to have an FX throughout the summer, this board was a perfect focal point for our center-stage back wall. Normally, for our FX, the board hung vertically and we would use chalk pens to write the Life App on it. We had drilled holes and pushed colored bulbs through each hole to create a lit border, similar to a Broadway marquee, so this was perfect for our light-themed stage!
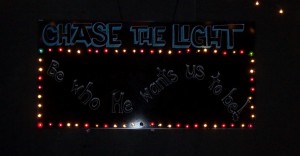 Here is how we used the board it and set up the stage around it:
- We hung the board horizontally across our center stage back wall.
- Across the top of the board we wrote “CHASE THE LIGHT.” This stayed all summer long. Inside the lit portion we wrote the weekly memory phrase (as suggested in the curriculum each week). This portion changed each week.
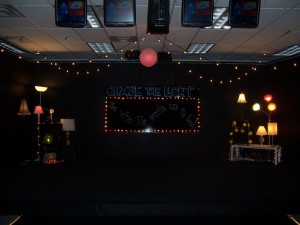 On either side of the focal board, we set up tables and benches of varying heights. We placed the lamps people had donated on these items to create a fun lighting scenario on either side of the stage.
- We hung string lights across the stage itself and placed one large paper lantern in the center of it all.
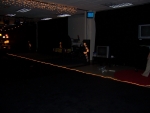
- Coming from our stage, we placed the carpets we use for our Large Group area in a row from the entrance of our environment up to the stage itself.
- We used rope lighting on either side of our carpet to set the large group area apart and add more light.
FYI – The narrow setting for large group seating was different for us. We felt like it looked cool, set up the environment from the moment you walked in, and created space on either side of the large group area for our stations (see below). As a result, we were okay exchanging the wide seating arrangement for a deeper one for the 8 weeks of this series. It would not be something I recommend long term, as kids in the back tend to get “lost” and distracted. It worked okay for us since large group was so video driven during this series, and everyone was more focused on the screens rather than the stage for this portion of the morning. In addition, it was not a permanent setting.
Our Environment
We like to carry the Summer XP theme for each program beyond our stage and into our entire environment. Here is how we did that for Chase the Light:
- As mentioned above, we changed the configuration of our large group carpets and added rope lighting to either side.
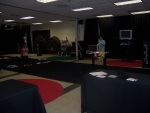
- On either side of the large group carpets, we set up stations around the room. See details below.
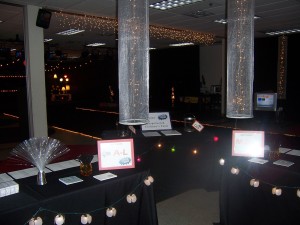 We hung cylindrical mesh lamps (borrowed) around the room to separate the stations. These set a great mood when kids and parents entered the room.
- We used string lights everywhere we could – on our registration tables, resource bin area, and Compassion International-Service Project table.
- We used fun lamps wherever we could again -registration tables, resource bin area, etc.
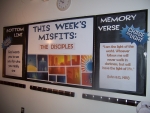
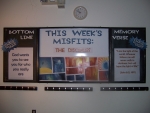
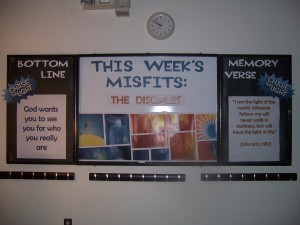 We created signage for our boards that were hanging in the room at that time. This signage included graphics from the series and denoted the Memory Verse, Bottom Line, and “Misfit of the Week” which was part of the story in the video production.
- We changed all of our registration materials and directional signage to include the Chase the Light logo.
Our Stations
During our Summer XP’s we always have stations for the kids to go to upon entering the environment. We extend the time prior to large group to give kids more time at the stations. Some stations are just for fun, but we always try to have a few that go along with the Summer XP theme or an element from the video story itself. So for this series, we had things like a Wii station with the Star Wars game and laser controllers, Lite Brites, and a video journal station like the main character Alex uses in the story.
We had seven stations total. Photos of each can be seen in the gallery below. The stations were:
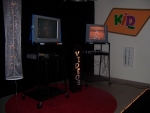
- VIDEO GAMES – We had two TV’s, one with XBox and one with PlayStation. We borrowed the gaming stations and a few games from our Student Ministry.
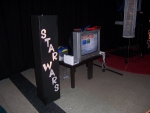
- Wii STAR WARS – We borrowed a Wii gaming station from a volunteer in our church. I purchased the Star Wars game and lasers.
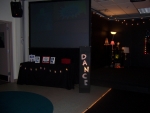
- DANCE – We played appropriate music videos on our large screen (Hoe Down Throw Down, Cotton Eyed Joe, Cupid Shuffle, etc.) and kids could dance to them.
- GAMES – We had a small floor hockey table and foosball table
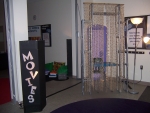
- MOVIES – In the large group production, one of the main characters has a video journal he works on each week. This station was a play off of that. We had a Macbook set up on a table and allowed kids to video tape themselves. We used Photo Booth to add effects and let them create their own “video journal.” An adult had to man this station at all times.
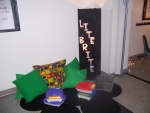
- LITE BRITES – We collected/purchased several Lite Brites and set them up in a corner with pillows to make a cozy place to have fun and create.
- PLUG IN – We used the suggested Plug In activities in the curriculum and had a space for kids to come and do that particular activity. It changed each week according to what the curriculum provided.
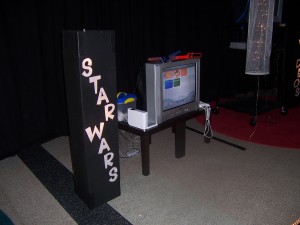 We created light boxes to mark/label our stations. Here was the process for that:
- We purchased several lamp boxes from a storage company (one per station).
- We cut the top and bottom off of each box.
- We cut out the name of each station on one side of the box.
- We painted the entire box black.
- We covered the open letters from the inside of the box by taping white tissue paper inside the box against where the station name had been cut.
- We had several Ikea floor lamps (Dudero type) from previous decor. Student ministry had a few too and let us borrow them.
- We removed the shade and placed the base of the floor lamp inside the box.
Well, that’s about it (ha ha)! Prepping for our summer series is always a bit more work than regular months, but we usually get permission to leave our environment in tact for the entire summer, so it doesn’t feel as bad to put a lot of time into it in June, and then not have to worry about set design/decor for two months. Interestingly enough, during this particular summer series, we had a wedding at our church and our elementary environment was used for the reception. We had to take the entire thing down and put it back up in one night! I am so grateful for good friends who jumped in and helped me get it done. To this day – we joke about that time we had to take down “Chase the Light!”
Even still, this was by far my favorite Summer XP. Not only did I love the way our environment turned out, but I really loved the content. The videos were so much fun and the idea of a “Misfit Brigade” (see the description here) just warms my heart. I think it’s because I could relate to each and everyone of the misfits!
How about you? What has been your favorite thing you’ve done for summer programming?


