02 Apr SHOWCASE – Control-Alt-Delete!
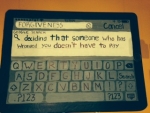
Life App: Forgiveness—deciding that someone who has wronged you doesn’t have to pay.
Theme: Control • Alt • Delete
Date: March, 2014
Geek Force Takes the World by Storm!
The Genius Bar at Apple and the Geek Squad at Best Buy have nothing on the Geek Force displays we’ve got here. This is our best SHOWCASE yet with 12 churches represented! And this is not your ordinary SHOWCASE with just galleries of photos. Great info abounds as leaders share about their creative process and offer tips for making and purchasing things. Even though March is over, this post is chock-full of helpful hints for future months!
Thank you everyone for sharing your photos and awesome creativity with Ready.Set.Sunday!
Southwest Community Church – La Quinta, CA
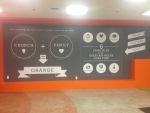
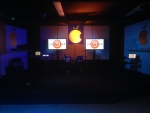
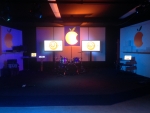
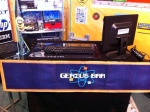
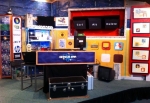
Kenny Jones and his team really took the Genius Bar to another level with their Orange Store! So clever!!! Also included in this gallery is a display that is part of a wall leading into their elementary environment. It is used to communicate the Orange philosophy to parents.
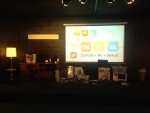
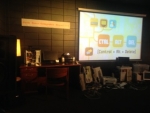
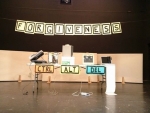
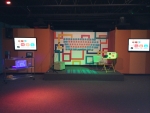
We created our own Orange store. The Life App is Forgiveness, but the stage focuses on the forgiveness that Jesus gives to us, that we are broken (displayed on the laptop on the left hand side of stage with other broken computers) and can become Brand New (displayed on the laptop on the right hand side of stage). We had our graphics guy print Orange stickers and put them on shipping boxes and he made a large stencil to create the larger oranges on the two side walls (spray painted) and the Orange logo that is back lit (center stage).
Kenny also shared a bit about their creative process leading into each month. Helpful info for sure!
I have a team of 4 people that help me dream, plan and execute the environment change. We usually have a meeting about the next month environment the 2nd Wednesday of the month. We read thru the Orange curriculum for large room and set suggestions and then brainstorm. We have a follow up meeting the following Wednesday (week 3) to talk thru any other ideas and make a final decision of what the room will look like. We formulate a prop list and find/purchase items that week. After week 4’s services, we tear down the stage and room and begin the build. It usually takes us 2-3 days to complete, depending on how much work we have created for ourselves. We put final touches on the set Saturday afternoon before our night service…that is our process…usually…in a perfect world!
Summit Church – Saint Paul, MN
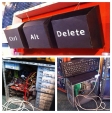
Brian Kiley’s set reminded me of something out of the movie “Jobs!” This is what he shared about the creation of their set, plus he sent a before and after picture!
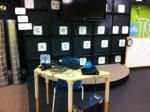
- We were going for a real nerd/techie looking computer repair space. One of my primary considerations, like many of us I imagine, is cost. I “raided” our church storage closet, used a desk from an office nobody is in a lamp that was… somewhere:)
- It worked great for week 2 as we had the Prodigal Son waste his money on computer parts rather than some of the other graphic stuff. This stage design has also worked well with our Special Agent Badges that we give out during the beginning of the Power Up piece.
Family Life Christian Fellowship – San Diego, CA
Bernie Lopez shared the details of her plan for the month:
- Made a couple of circuit boards out of what I had laying around and saved (bottles, food containers, K-cups put together, some blocks, foil, tape all on painted cardboard)
- Giant keyboard like in my Pinterest board for March http://www.pinterest.com/patnb…
- Borrowing my friend Karrie’s idea to hang CD’s on ceiling.
- Giant Ipad or computer screen out of paper for the front wall with “Control, Alt, Delete” on it.
- Made Minecraft Tshirts for staff’
Hope Church – Cordova, TN
Shelly Cheng shared the details of what she created:
- Stage background looks like a giant keyboard.
- Stage Right has a repair table with miscellaneous gadgets, middle has a mark and wipe board/clock and weekly bottom line written on it.
- Stage left has a desk with jacket and HUGE Geek Force Badge and anything related to an office, etc.
- On the actual doors going into the room, I posted the ENTER key image
- Wall outside of stage area so parents can see monthly what we are working on.
- Keyboard we used the clamshell boxes from Amazon and cut them in half for the F1-10 buttons. Hot glued to paper to keep them up. Printed 11×17 letters and hung from ceiling to add more dimension. EASY!
- My files are located at: http://members.hopepres.com/ar…>LEAP>March>Decorating.
- I also created just a simple sign to put around the halls too.
- Going to draw/cut the Mouse Point and a the Hand from posterboard to use with skits and/or put on the stage backdrop somewhere…maybe point to the weekly bottom line?
- I blew up the Geek Force logo and changed it to our name of LEAP. Printed it as a poster size and then hung it on some black gator board from another month’s sign (on the back), then dangled cd’s around it.
Traders Point Christian Church – Indianapolis, IN
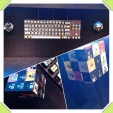
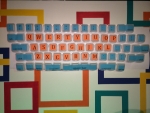
This month we’re featuring a giant keyboard, with the CTRL ALT & DELETE keys highlighted in bright orange. You can access the file for the keys at http://elementarytechteachers….. You’ll probably need to add a few keys, though, because it’s a bit of a mix of PC and Mac. I used PC version since there’s no ALT key on a Mac. I also pieced together giant floppy disk cubes using donated and e-bay-cheap purchased 3 1/2 floppy disks. I literally just hot glued them together! Easy! (If you buy floppy disks for crafts, be sure to search for the non-working ones for craft projects. You can buy a pack of ~100 for less than $20.) See photo here: https://twitter.com/TPCCKids/s…
ST. Paul’s Lutheran Church – Orange, CA
Diane Gihring shared this about her set that is housed in what sounds like a multi-purpose environment:
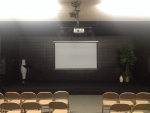
Here’s how our set turned out…it had to be pretty simple since we have to take it down at the end of each Sunday to accommodate a school musical this month.
Cornerstone Baptist Church – Richmond, KY
Rachel Christian shared this about her set:
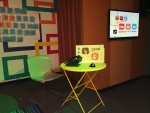
- We took a small folding table (48″x 24″) and wrapped it in a black plastic table cloth. I found all the pictures of the apps by doing a google image search, along with the iPhone home button. I took thin white yarn to make a border of the screen and that was pretty much it! It was really simple and the kids loved it! Especially when we threw in some icons like Candy Crush.
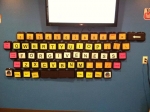
- The keyboard is made out of small (sandwich sized) takeout food containers. We called around to some local restaurants and Zaxby’s donated about 40 containers. We pinned them to the wall with push pins and printed the letters off of the computer.
- We transformed our bulletin board into a giant computer by wrapping the wooden edges in black construction paper.
- We also found the “start” button via google image search and made the pointer on Microsoft publisher.
Highpoint Church – Memphis, TN
Katie Clark shared this about her set:
Here are a few pictures of one of our March environments this month. We didn’t quite get finished in time, so we are going to add a couple of things each week to keep it interesting. The script was perfect for that though because it asked the kids to make suggestions!
Shandon Baptist Church – Columbia, SC
Leslee Tavenner shared this info about how they created their hanging apps!
I used Google images to come up with the icons that kids would be most familiar with; set them in a Word document and scaled them to be about the same size each. Made two copies of each on cardstock. We found these small jewelry boxes and used the lids (3”x3”). Painted the edges black and strung fishing line through one end for hanging. We then glued the images to the top and bottom of the lid. We also made a big iPad from foam insulation board and hung it along with big Cntl, Alt, Del buttons.
Good Samaritan Church – Homestead, FL
Maria Reyes and her team have a new space for their children’s environment! Very exciting! Check it out:
Northshore Christian Church – Everett, WA
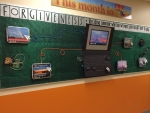
Teresa Lutz shared a bit about the multi-purpose space they are a part of and how they create decor for it each month. She also shared about a display they usually reserve for “Orange” themed topics, service projects, or summer camp. The photos you’ll see in this gallery were created this past fall when Northshore hosted the Seattle Orange Tour Stop!
The bulletin board in the photos is located in the hallway of our Children’s Wing. It is 12 feet by 4 feet. We decorate it each month to reflect the monthly Life App. During the week this hallway is a main thru way for our K-8 Academy parents and students. The academy has adopted the monthly virtues/Life Apps that we use at church on the weekends incorporates them into their classrooms and chapels. So this board serves double duty.
One thing my team and I strive for is to make boards that are 3 dimensional, we add many different textures and always challenge ourselves to find mediums that will pop off the board. Many times we carry elements from the bulletin board over to our stage area, but sometimes we use the screen images provided by Orange to help create our environment.
- To create the board I started by covering the entire board with black paper. On top of the black paper I found the 2 feet wide green mesh “ribbon” at Hobby Lobby.
- To create the laptop computer in the center of the board I used 2 thin pieces (1/4”) of black foam core and free handed a key board on one portion and the “screen” on the other portion. I chose to highlight the theme CTL + ALT + DEL on the screen of this laptop.
- The desktop look on the screen was created by finding an image of a local landmark and editing it to add desktop icons and words to explain CTL + ALT + DEL. CTL- control your emotions, ALT- alter your response, DEL- delete the offense. To hang this (pretty tricky doing it by myself!) I suspended the “screen” of the laptop from the ceiling tiles and then hot glued the keyboard in place (with a wedge mounted on the back to give it a tilt).
- Once both pieces were up, I placed a piece of black gaff tape over the seam between the two pieces of foam core to connect them and better secure them.
- To create the network computers or ipads surrounding the main computer I used additional pictures of local landmarks editing them to add desktop icons to them. The images have been edited to include the bottom lines. I also like to add the date or week # to the bottom line. This month I used the arrow that one would see when they let a mouse hover over an image on the computer. I glued the pictures to silver cardstock, cut into the shape of an ipad and then mounted them on gift boxes (like a shirt box but smaller) that were wrapped in black.
- After I had the computers hung, I started adding details. I borrowed from our media department old computer parts. I hot glued a mouse, a motherboard, and other miscellaneous computer parts to the board. I used spare computer cords/wires to connect the computers to one another (had to pull out the heavy duty staple gun for this!)
- Cricut the letters in black for forgiveness and the definition and placed them on a silver background at the top of the board.
- On average these bulletin boards take 2 people approximately 8 hours to create.
New Generations Children’s Church – Larose, LA
Josh Cheramie shared these amazing photos of his set. Great attention to detail!


