


08 Jan Commitment – Rehearsal Room! – January 2015 – Part 1: Our Plans & Process
Life App: Commitment – making a plan and putting it into practice.
Theme: Rehearsal Room!
Date: January, 2015
Plans & Preparation…
As you may have read in this post, I did not follow my usual process for preparing our environment this month. Instead, I had my first look at the suggestions in 252 Basic’s Get Ready Section of the curriculum on Monday, 12/29. Six days prior to launch. Since I’ve already spent an entire post confessing (and discussing what a bad idea this was) I won’t waste any more time on it here – except to say, I had a lot of ideas that didn’t pan out because of my lack of time, manpower, and resources. Did I mention planning/working ahead is a New Year’s Resolution of mine? 🙂 Okay, enough about that!
My Personal Brainstorm Session
 A C3 KIDS CONSERVATORY – After reading the suggestions in the curriculum and the scripts for each week – I really liked the idea of having all four areas of rehearsal represented (music, theater, dance, exercise). I put e-mails out and made requests for all sorts of equipment on social media and people responded. I got tons of dance shoes, sheet music, instruments, weights and even a ballet barre! So, I was off to put my first idea in place – a conservatory of sorts on our stage. Think Fame or Step Up!

- I planned to section of the stage into four “rooms” by using our backdrop peices (insulation foam) and hinging them together to create four separate spaces. Each one would represent a different genre and would be decorated accordingly. When I got to the environment on Tuesday and began working on this – I realized quickly that it wasn’t going to work. Our stage was not big enough (it would have been extremely cluttered) and I’d have to cut down all of the boards so they would not block the screens that are above our focal wall. No time for any of that… so PLAN B came into play!
- WEEKLY REHEARSAL ROOMS
- I decided to go with the suggestion for weekly rehearsal rooms according to the genre in each script this month. I actually think that while this will be a bit more work for me each week – it will really drive the point home about each Faith Skill and the idea of practicing and making a commitment to something.
- So, I set off to design sets for the following:
- Week 1 – Music Rehearsal Room
- Week 2 – Theater Rehearsal Room
- Week 3 – Dance Rehearsal Room
- Week 4 – Exercise/Gym Rehearsal Room
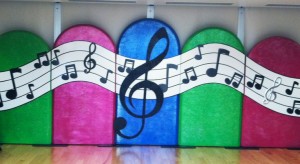 Brainstorm number 2 involved Week 1’s set. I wanted to have a large treble clef in the center of my focal wall, with notes on a banner behind it. I got this idea from one of the photos 252 Basics pinned on their Pinterest page. As I set off to enlarge the treble clef, I realized our projector was broken and once again – needed a PLAN B!
- PLAN B is where we landed for Week 1’s set. You’ll find the details and some photos of the process below.

- STATIONARY ELEMENT
- One thing I knew I wanted was a sign above the entire set that said “Rehearsal in Progress.” I decided this would stay up each week and indicate that practice/rehearsal was going on regardless of the activity. I created a marquee with lights all around the edge and used my Cricut to cut letters for the sign (yes, I got new sticky mats – see previous post if you don’t know what I’m referring to).
The Weekly Sets
Since our set will change each week, here is an idea of where we are headed for the month:
- WEEK 1
- I decided to make a large scale piano to stretch across the entire backdrop and print some musical scales to hang around it.
- The “Rehearsal in Progress” sign hangs above the piano.
- I borrowed some music stands from our Worship Arts team, set up some chairs and placed instruments and sheet music around as if there was a rehearsal about to begin.
- WEEK 2
- The stage is stripped of everything except the Rehearsal in Progress sign. I’ve hung red velvet drape on either side of the backdrop and pulled them open to resemble a curtain.
- Donated drama masks, a star, and some playbills hang center of the drape.
- A director’s chair, some instruments, a prop bin, a clacker, and a clothing rack full of costumes, are placed on either side of the stage to look as though a rehearsal is about to take place.
 WEEK 3
- Again, the stage is stripped of everything except the Rehearsal in Progress sign.
- I’ve ordered some reflective mirror paper from Amazon and plan to hang it center stage on the focal wall.
- A ballet barre will sit in front of the mirror we create from the reflective paper.
- Dance shoes and dance bags will be placed around the stage in crates or bins.
- Dance posters including Hip Hop, I pod, and ballet dancers will hang on either side of the mirror.
***NOTE***
I originally only had ballet, tap, and jazz represented for our dance week, but realized those 4th/5th grade boys would probably hate that and might not be as engaged, so I found some images of hip hop dancers (appropriate ones!) and I pod dancers and printed them on 11X17 paper. I will mount them on craft foam boards and hang them with the ballet photos. I also plan to put some hip hop dance shoes (aka sneakers) alongside the ballet slippers and tap shoes. 🙂
 WEEK 4
- This week the stage is stripped of everything except the Rehearsal in Progress sign and the mirror. We’re keeping the mirror since we are creating a gym/exercise room.
- I’ve borrowed a weight bench, weights, a stability ball, resistance bands, etc. to place in front of the mirror and make it look like a gym.
- I’ve googled images of elementary gym posters and printed some fun clip art images of weight lifters and people exercising (on 11X17 paper). I’ll mount them on craft foam board and hang them on either side of the mirror.

So, Week 1 has already happened and it turned out pretty well considering. You might be happy to know that Week 2’s set is already up and ready – HOORAY! I’m happy about that. 🙂 I’ll be posting the “finished product” photos of our environment each week, but for now- here are a few photos of the process it took to create Week 1.


How did your environments turn out for your Rehearsal Room? Be sure to post your photos (and include any details about your process that might be helpful for others) in the comments section below or on upload them to our Facebook Page or Twitter. Thanks for sharing. I can’t wait to see what you’ve come up with!
