


23 Jan Stuff We Like (Must Have Tools)
The Resource Tab on our Home Page has 3 separate sections: Tools – Tips – Supplies. These pages have detailed breakdowns of all of the stuff we use, but here you’ll find five of our favorites and why we began using them. These are the “must haves” in our arsenal. Even when our budget is tight and our resources are limited, we can go to these items and create something fun and engaging.
Insulation Foam
 This is the staple of our set designs. We wanted to develop a neutral backdrop that we could enhance to reflect the monthly theme from 252 Basics. So, we purchased 9- 8’x4’x1” insulation foam panels and painted them black. We secured them to the stage by using Binder Clips and T-Shaped Quilting Pins on the top of the original set. Read more about that process here.
 These foam panels allow us to pin things to our backdrop. Things like posters, lettering, more insulation foam that we have carved into various shapes and elements, etc. Being able to pin things onto the backdrop allows us to be portable. Each week, we remove the elements of the stage design and leave the black panels in place for a neutral look that our student ministry then takes and makes their own.
When we began painting our backdrops different colors, we needed to find a way to keep things quick and easy for set up and break down, so originally, we would place the black panels up first (as described above) and then pin the colored backdrop in front of the black. From there we would pin our stage design elements in place. When it was time to break down each week, we would remove all of the layers up to the black backdrop, which stayed in place for student ministry and other events throughout the week.
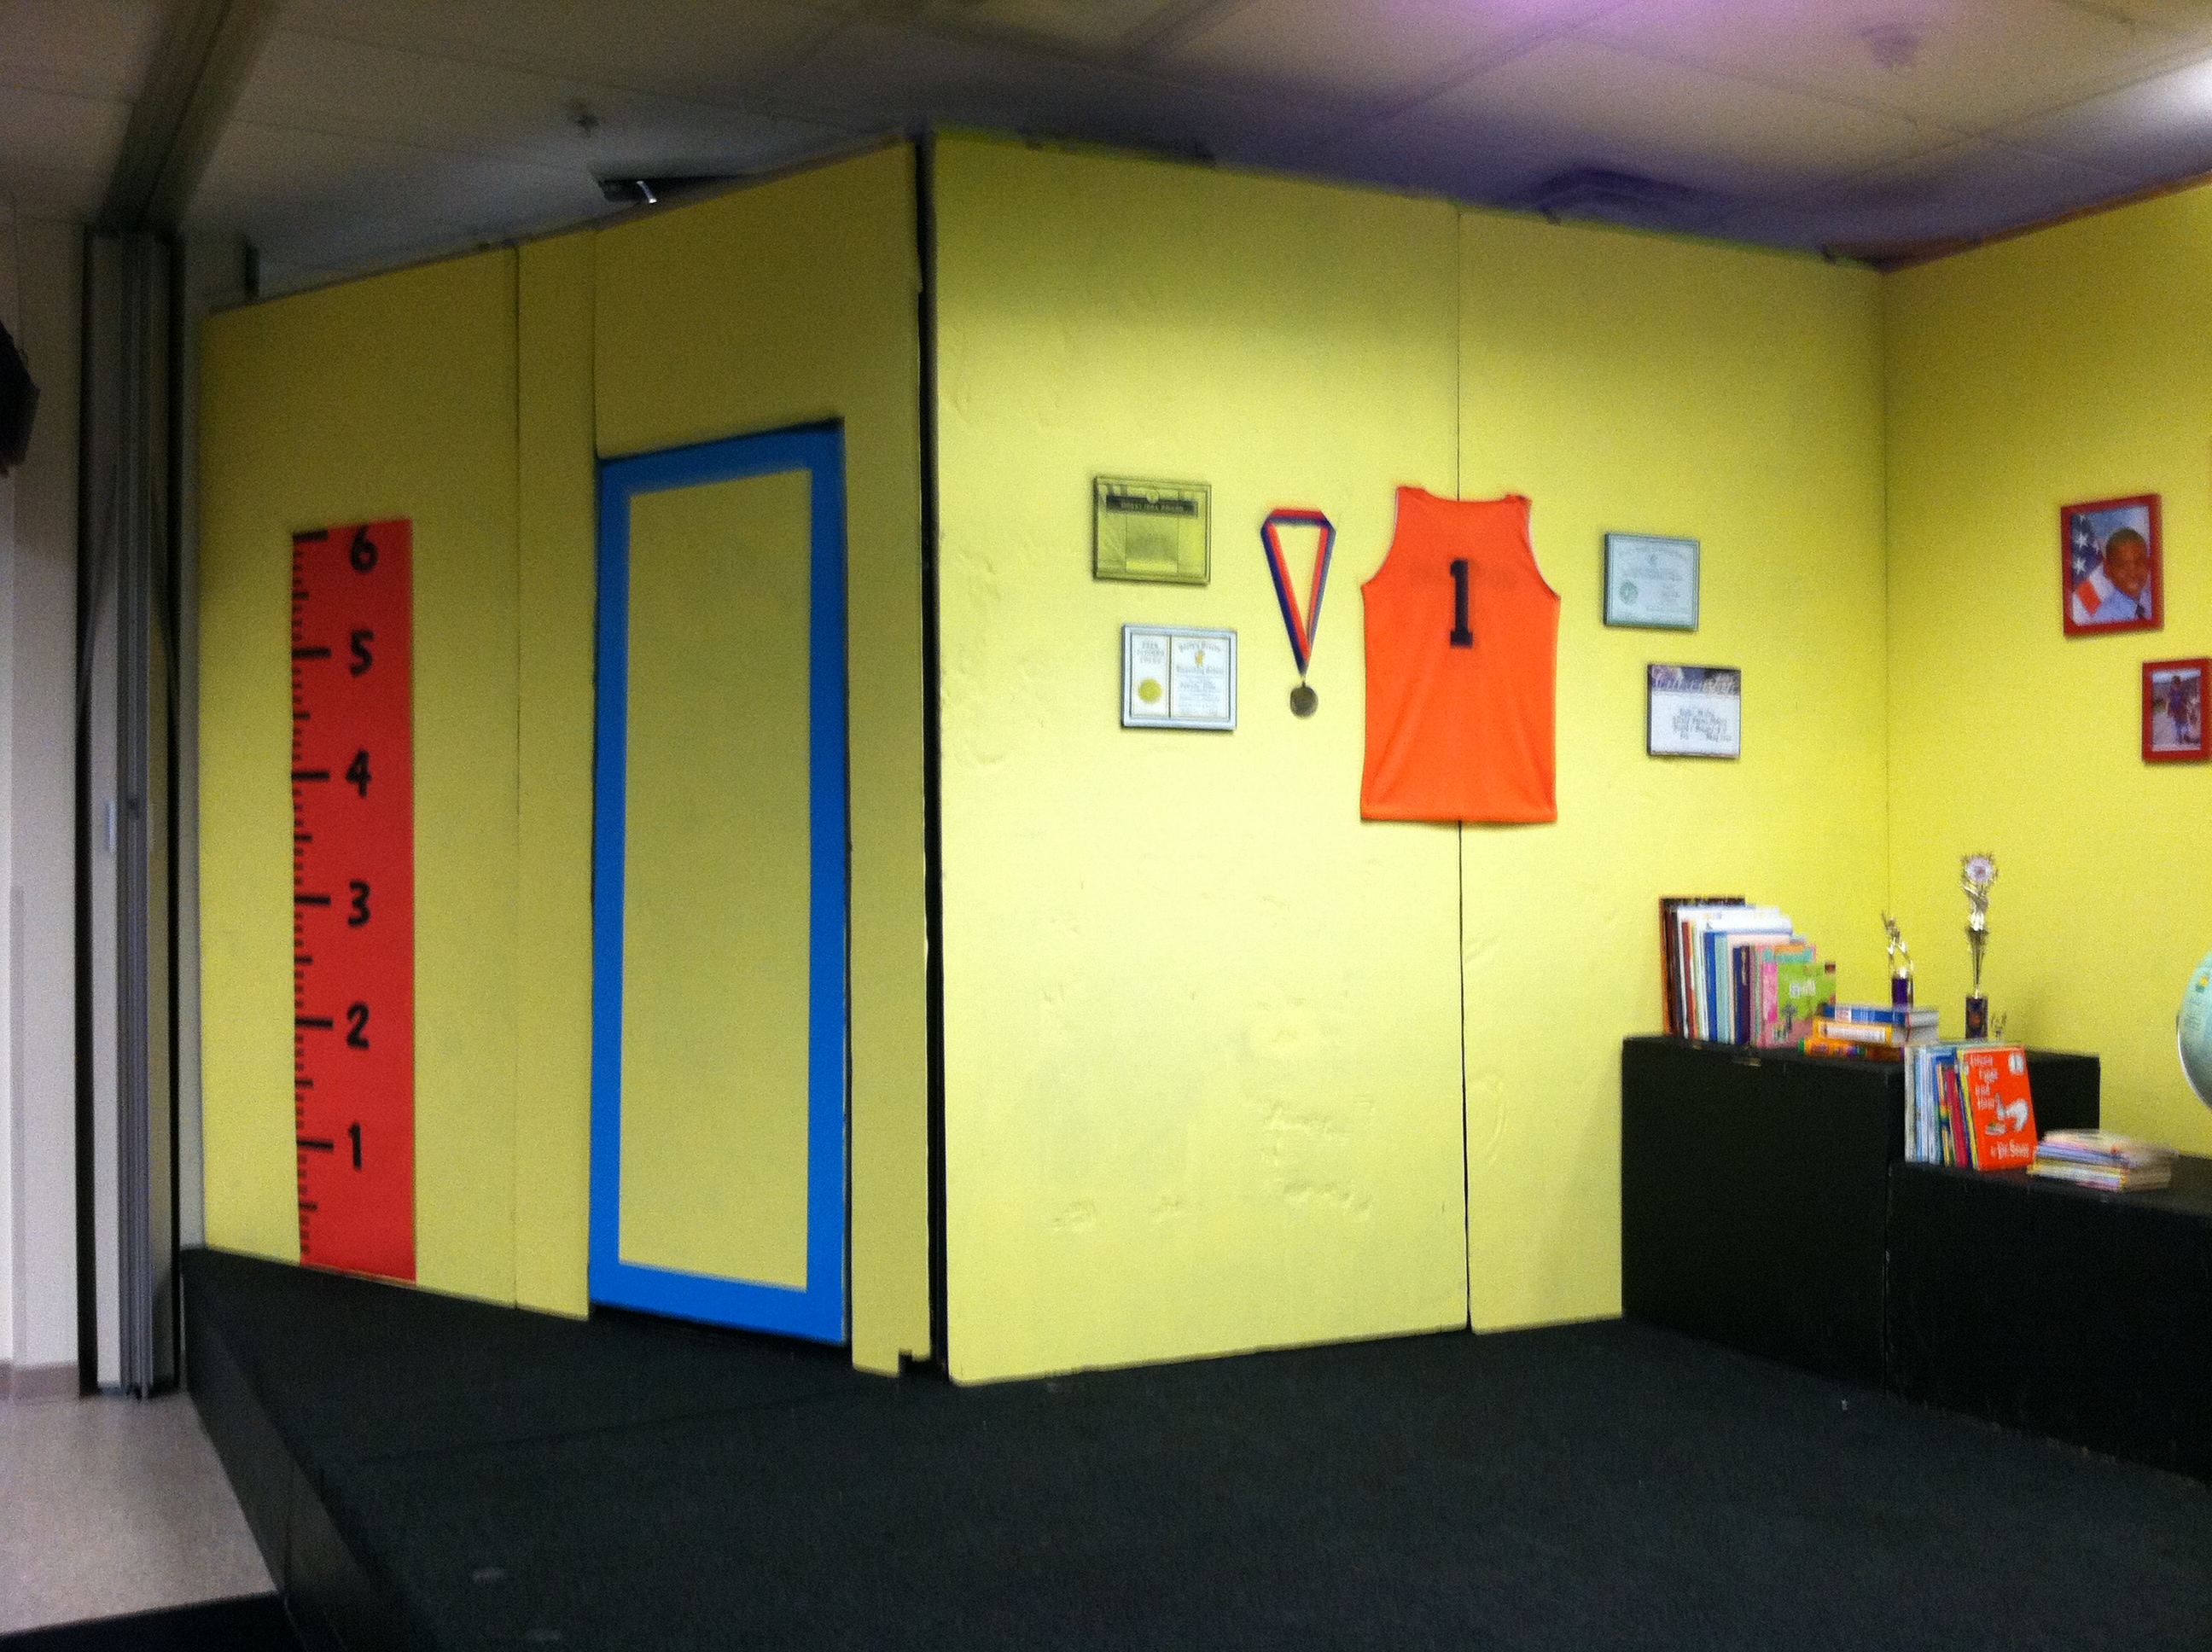 If you look closely at the corner in this set, you’ll see the black layer underneath the yellow.
Since that time, we have designed something that holds up two layers of backdrops (2 foam panels-one in front of another) and uses a hinge system to hold the panels in place. We do not need to pin the backdrops together anymore, but that worked for us for years. It’s a good starting point if you are portable or share space.
Hot Knife

As stated earlier, we also use insulation foam to create the elements of our set design. This is where another one of our favorite tools comes into play, a hot knife. It is a must have for carving shapes and images that we create to make our sets.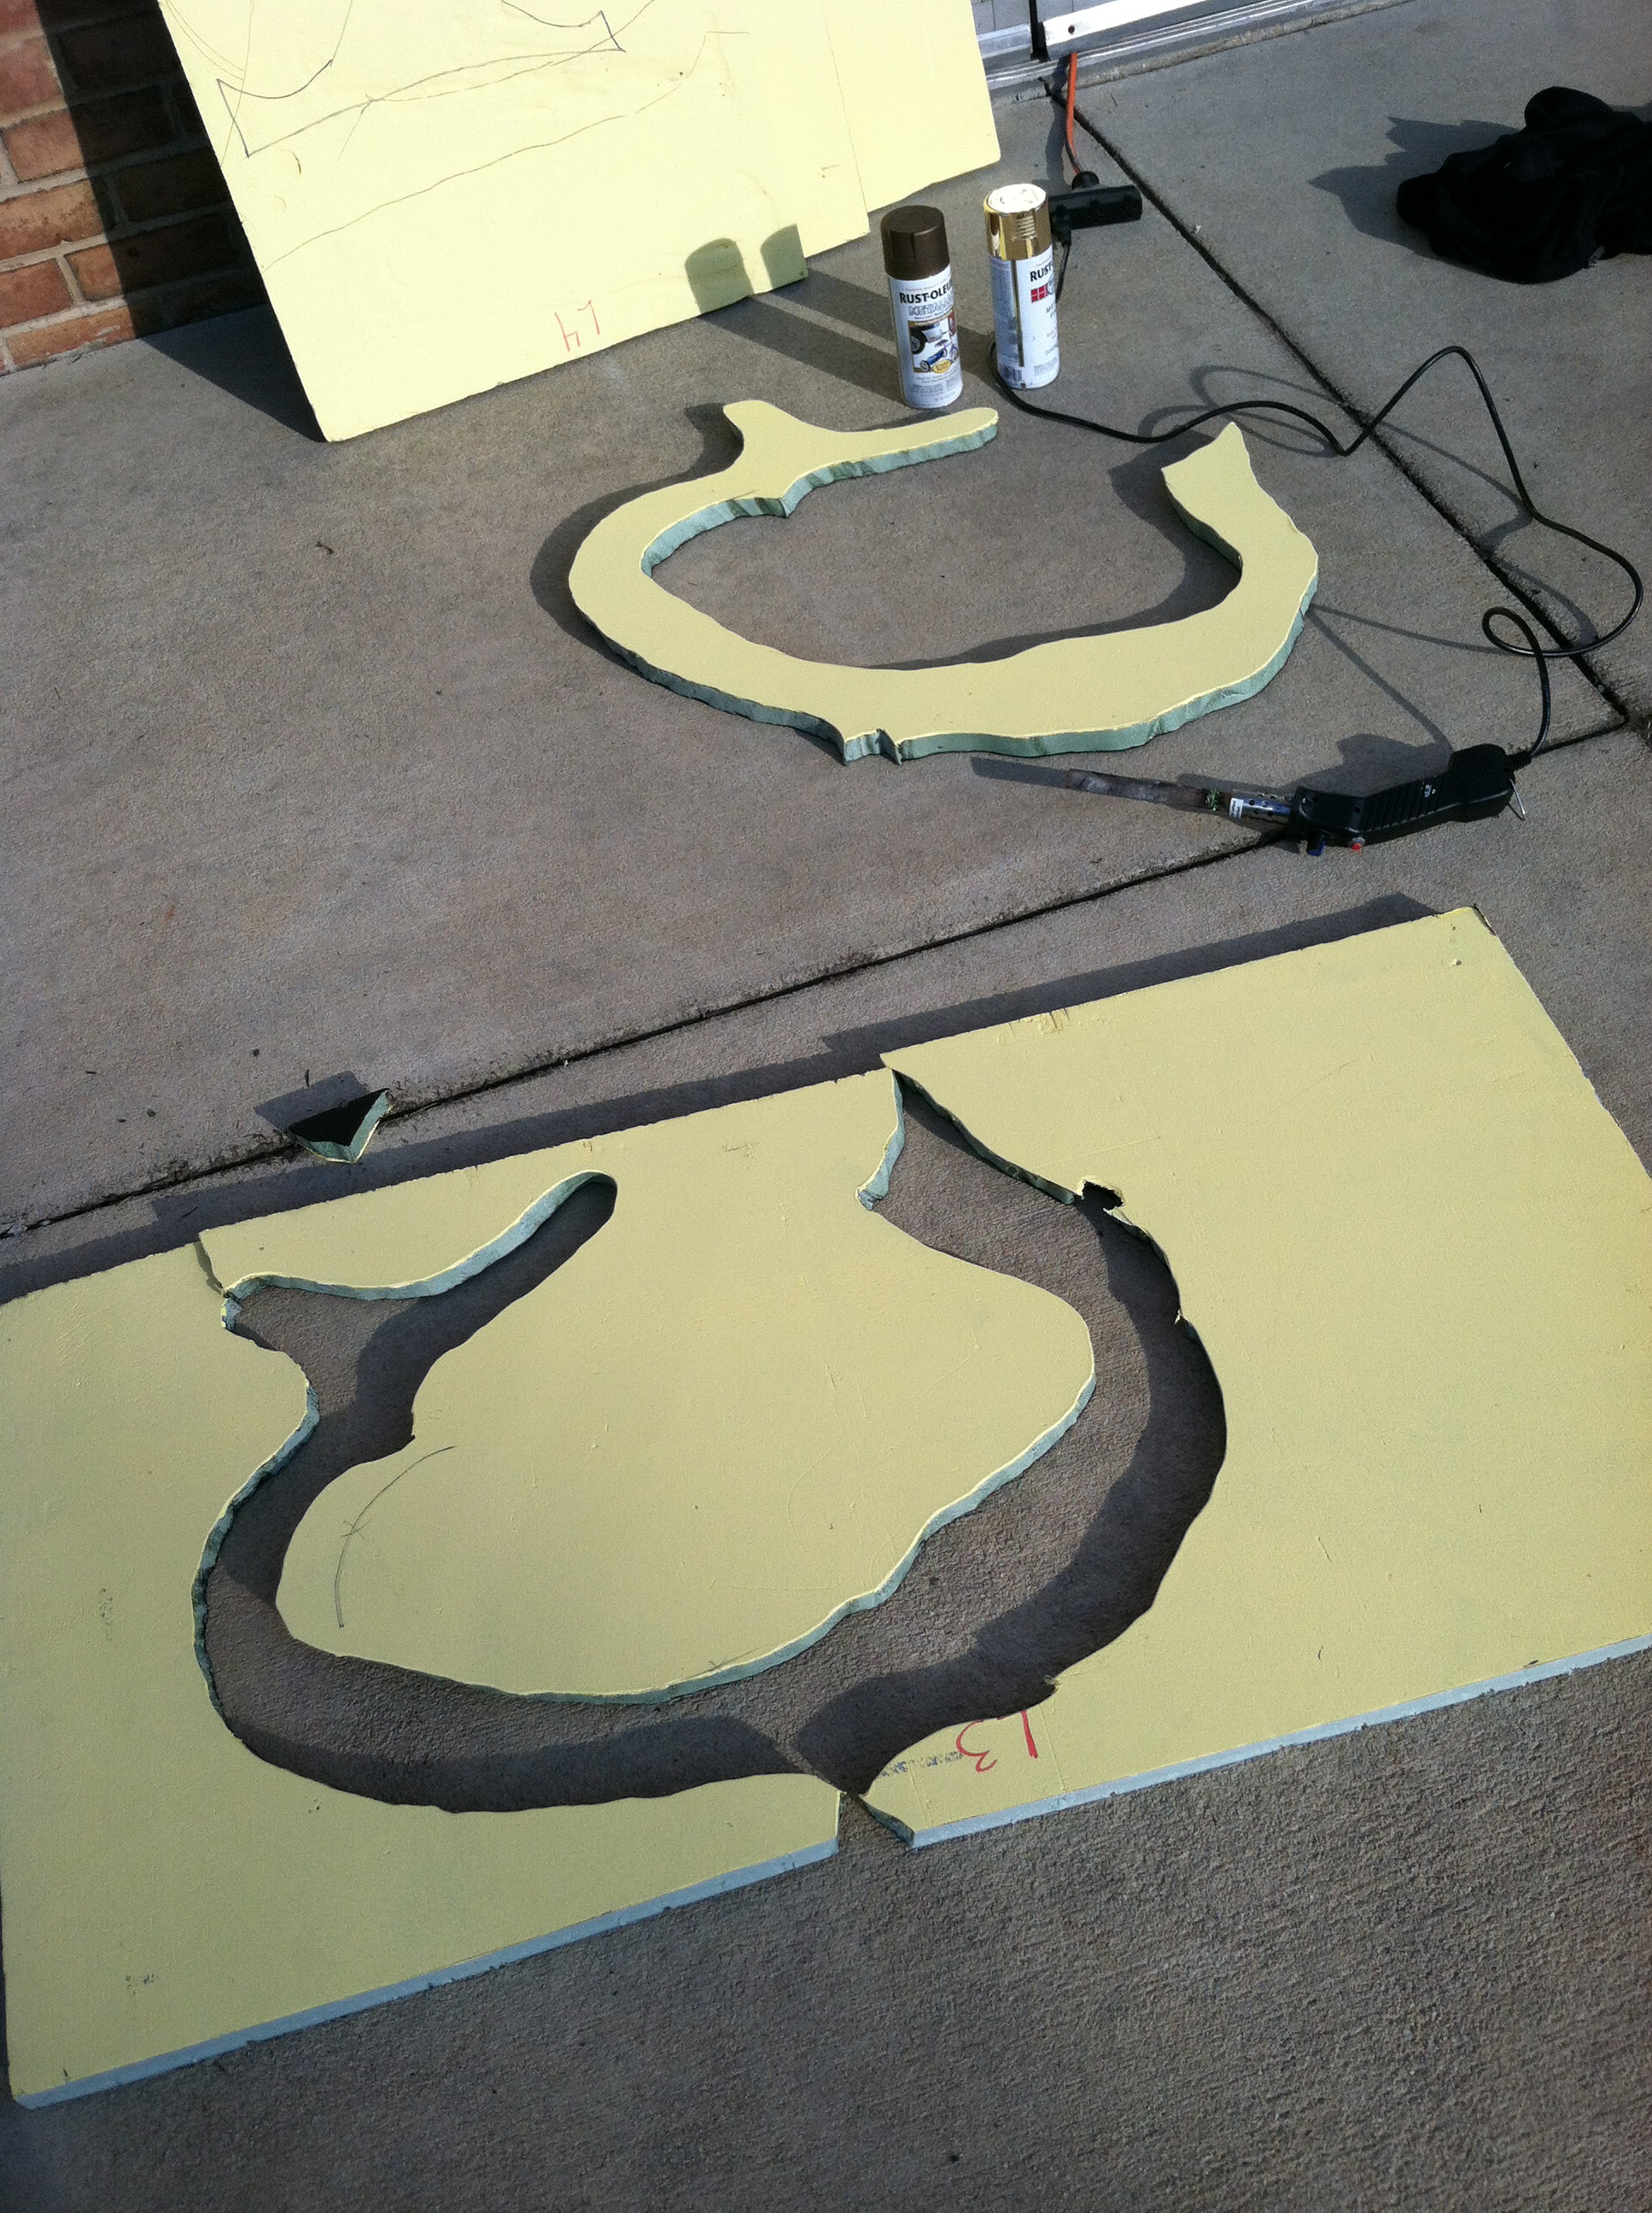
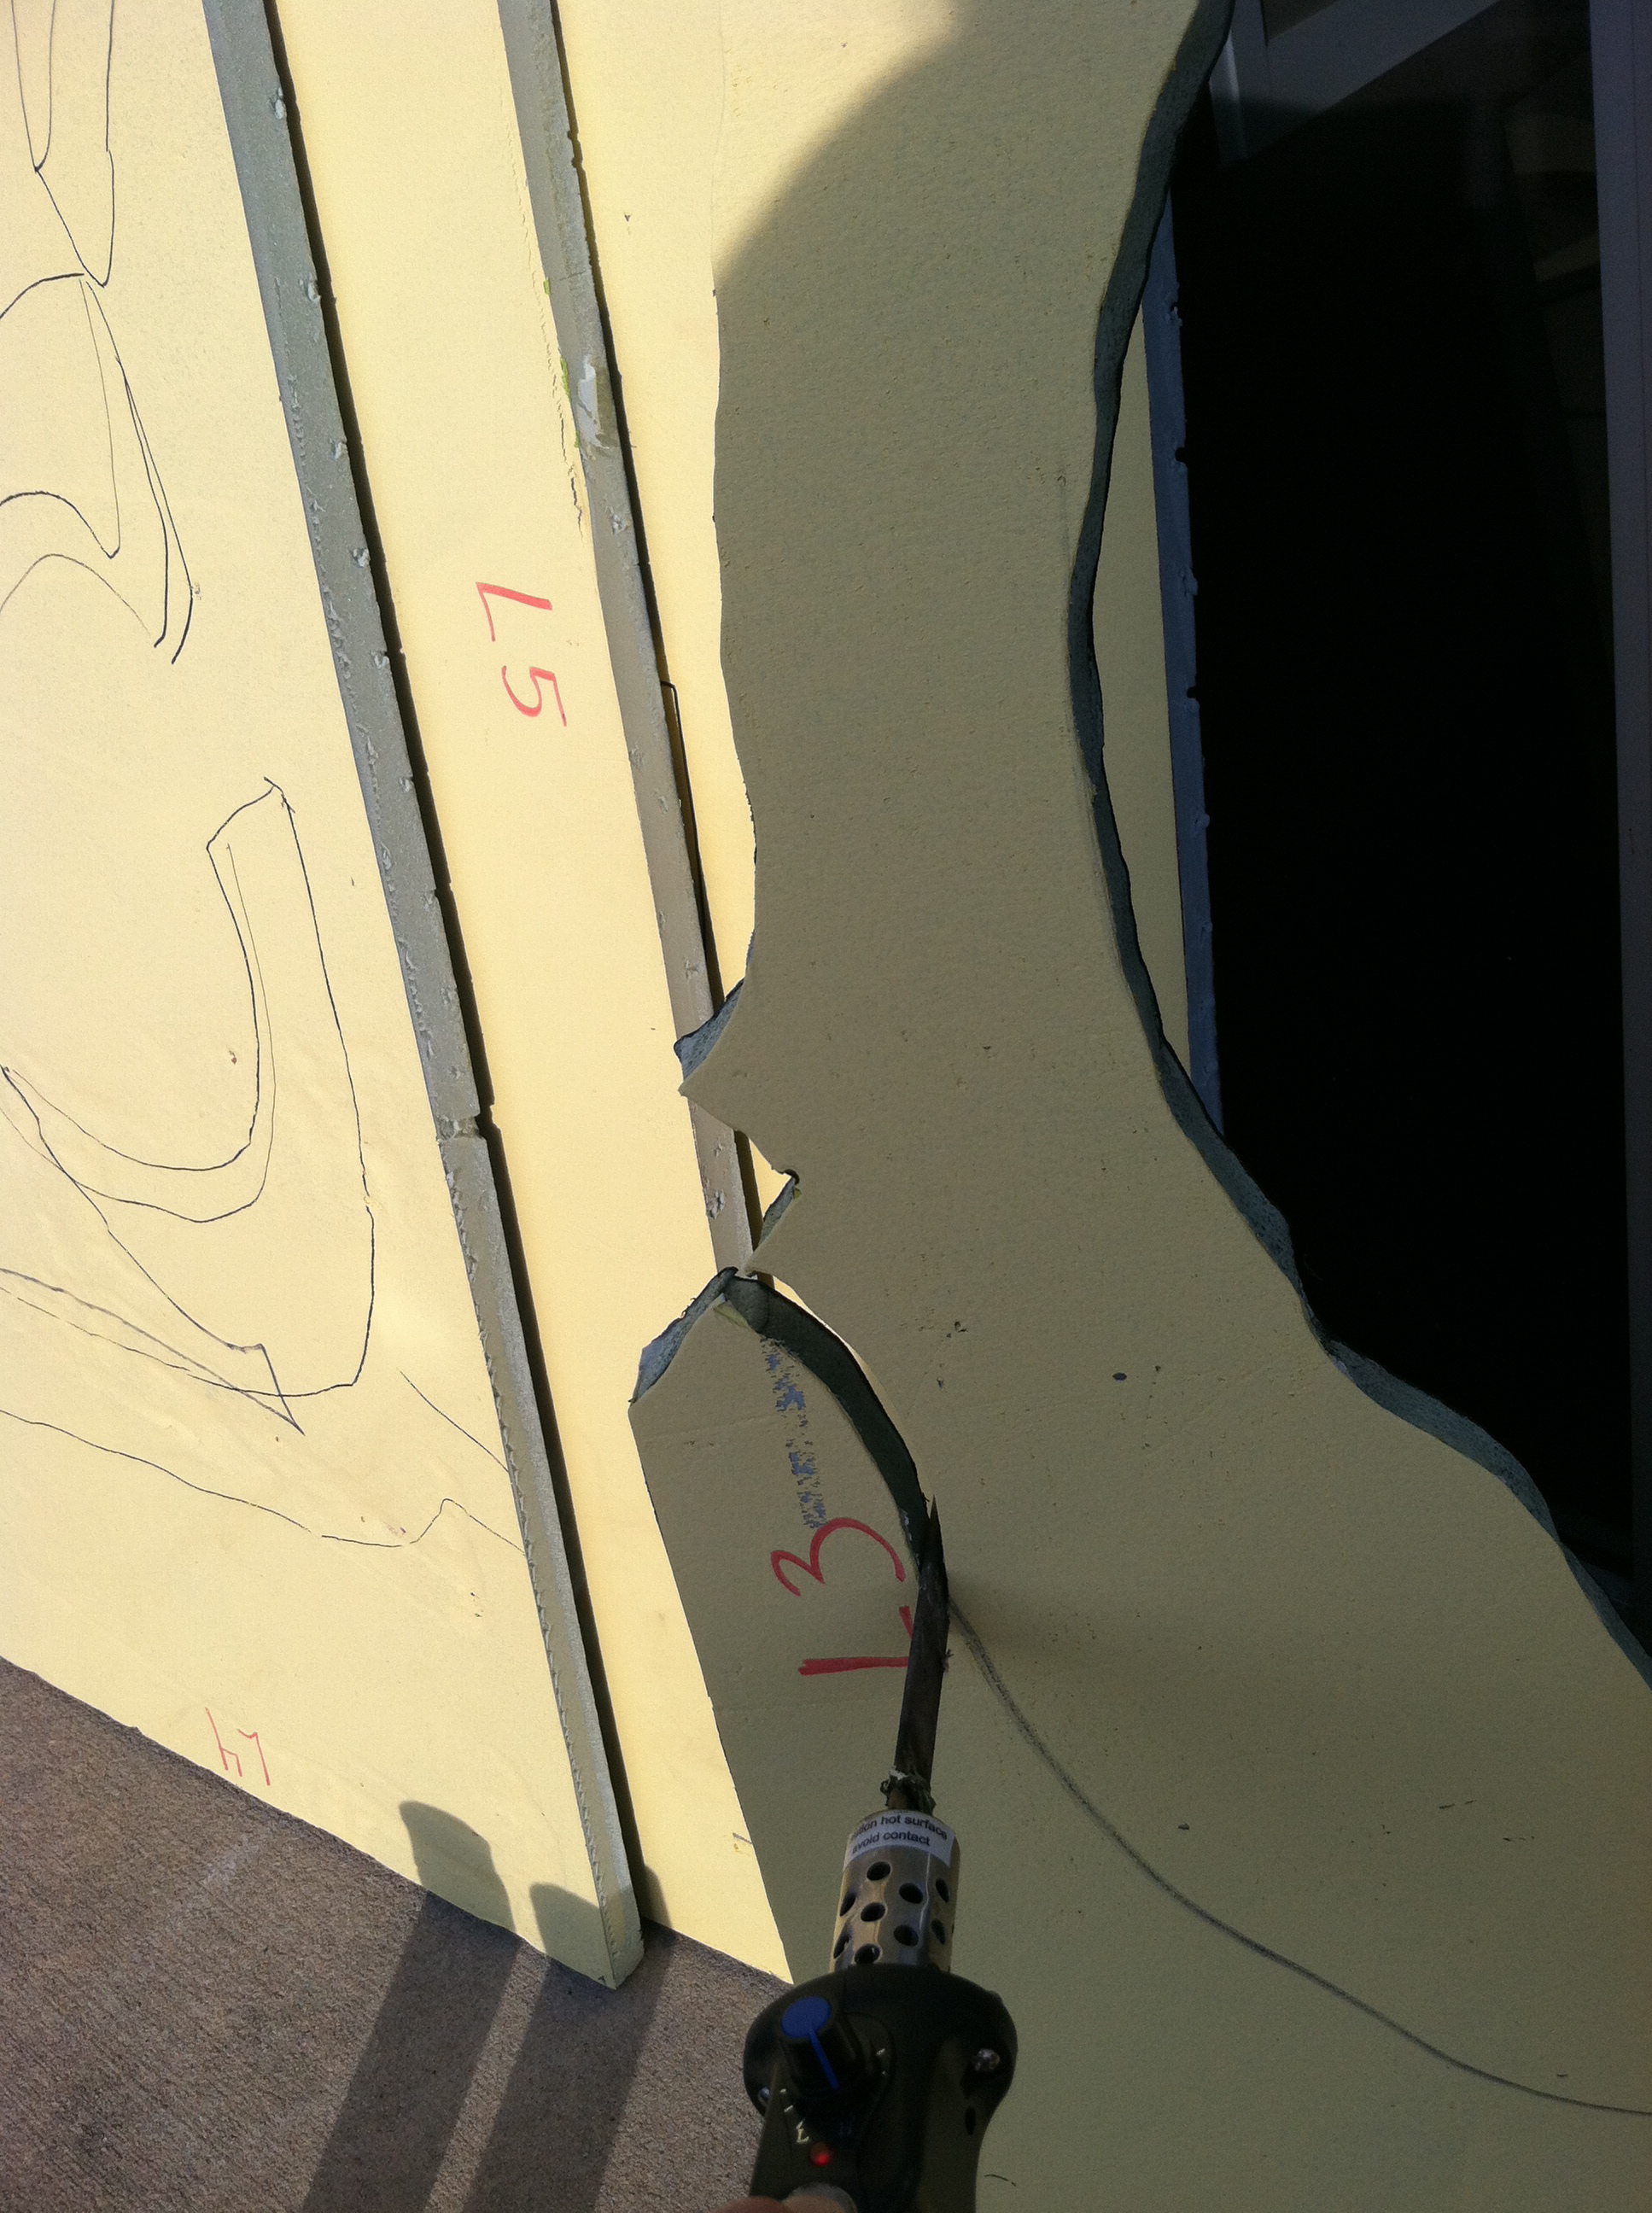
Be careful, the hot knife must be used outside and a mask should be worn as there are toxic fumes emitted as you carve. There are special masks that are available for this type of work. We currently do not have one and use carpenter work masks when carving, but considering the amount of carving we do, we are budgeting for a more effective mask in the future.
Quilting Pins

These pins are a key element for us. We use them for everything; holding our backdrop in place and pinning elements to the backdrop to create the set. It is important to get the 2” pins so that they will go far enough into the foam core to hold the design elements in place.
Paint
 Of course paint is a must! I myself am not an artist, but I can project images and trace as well as the next guy!
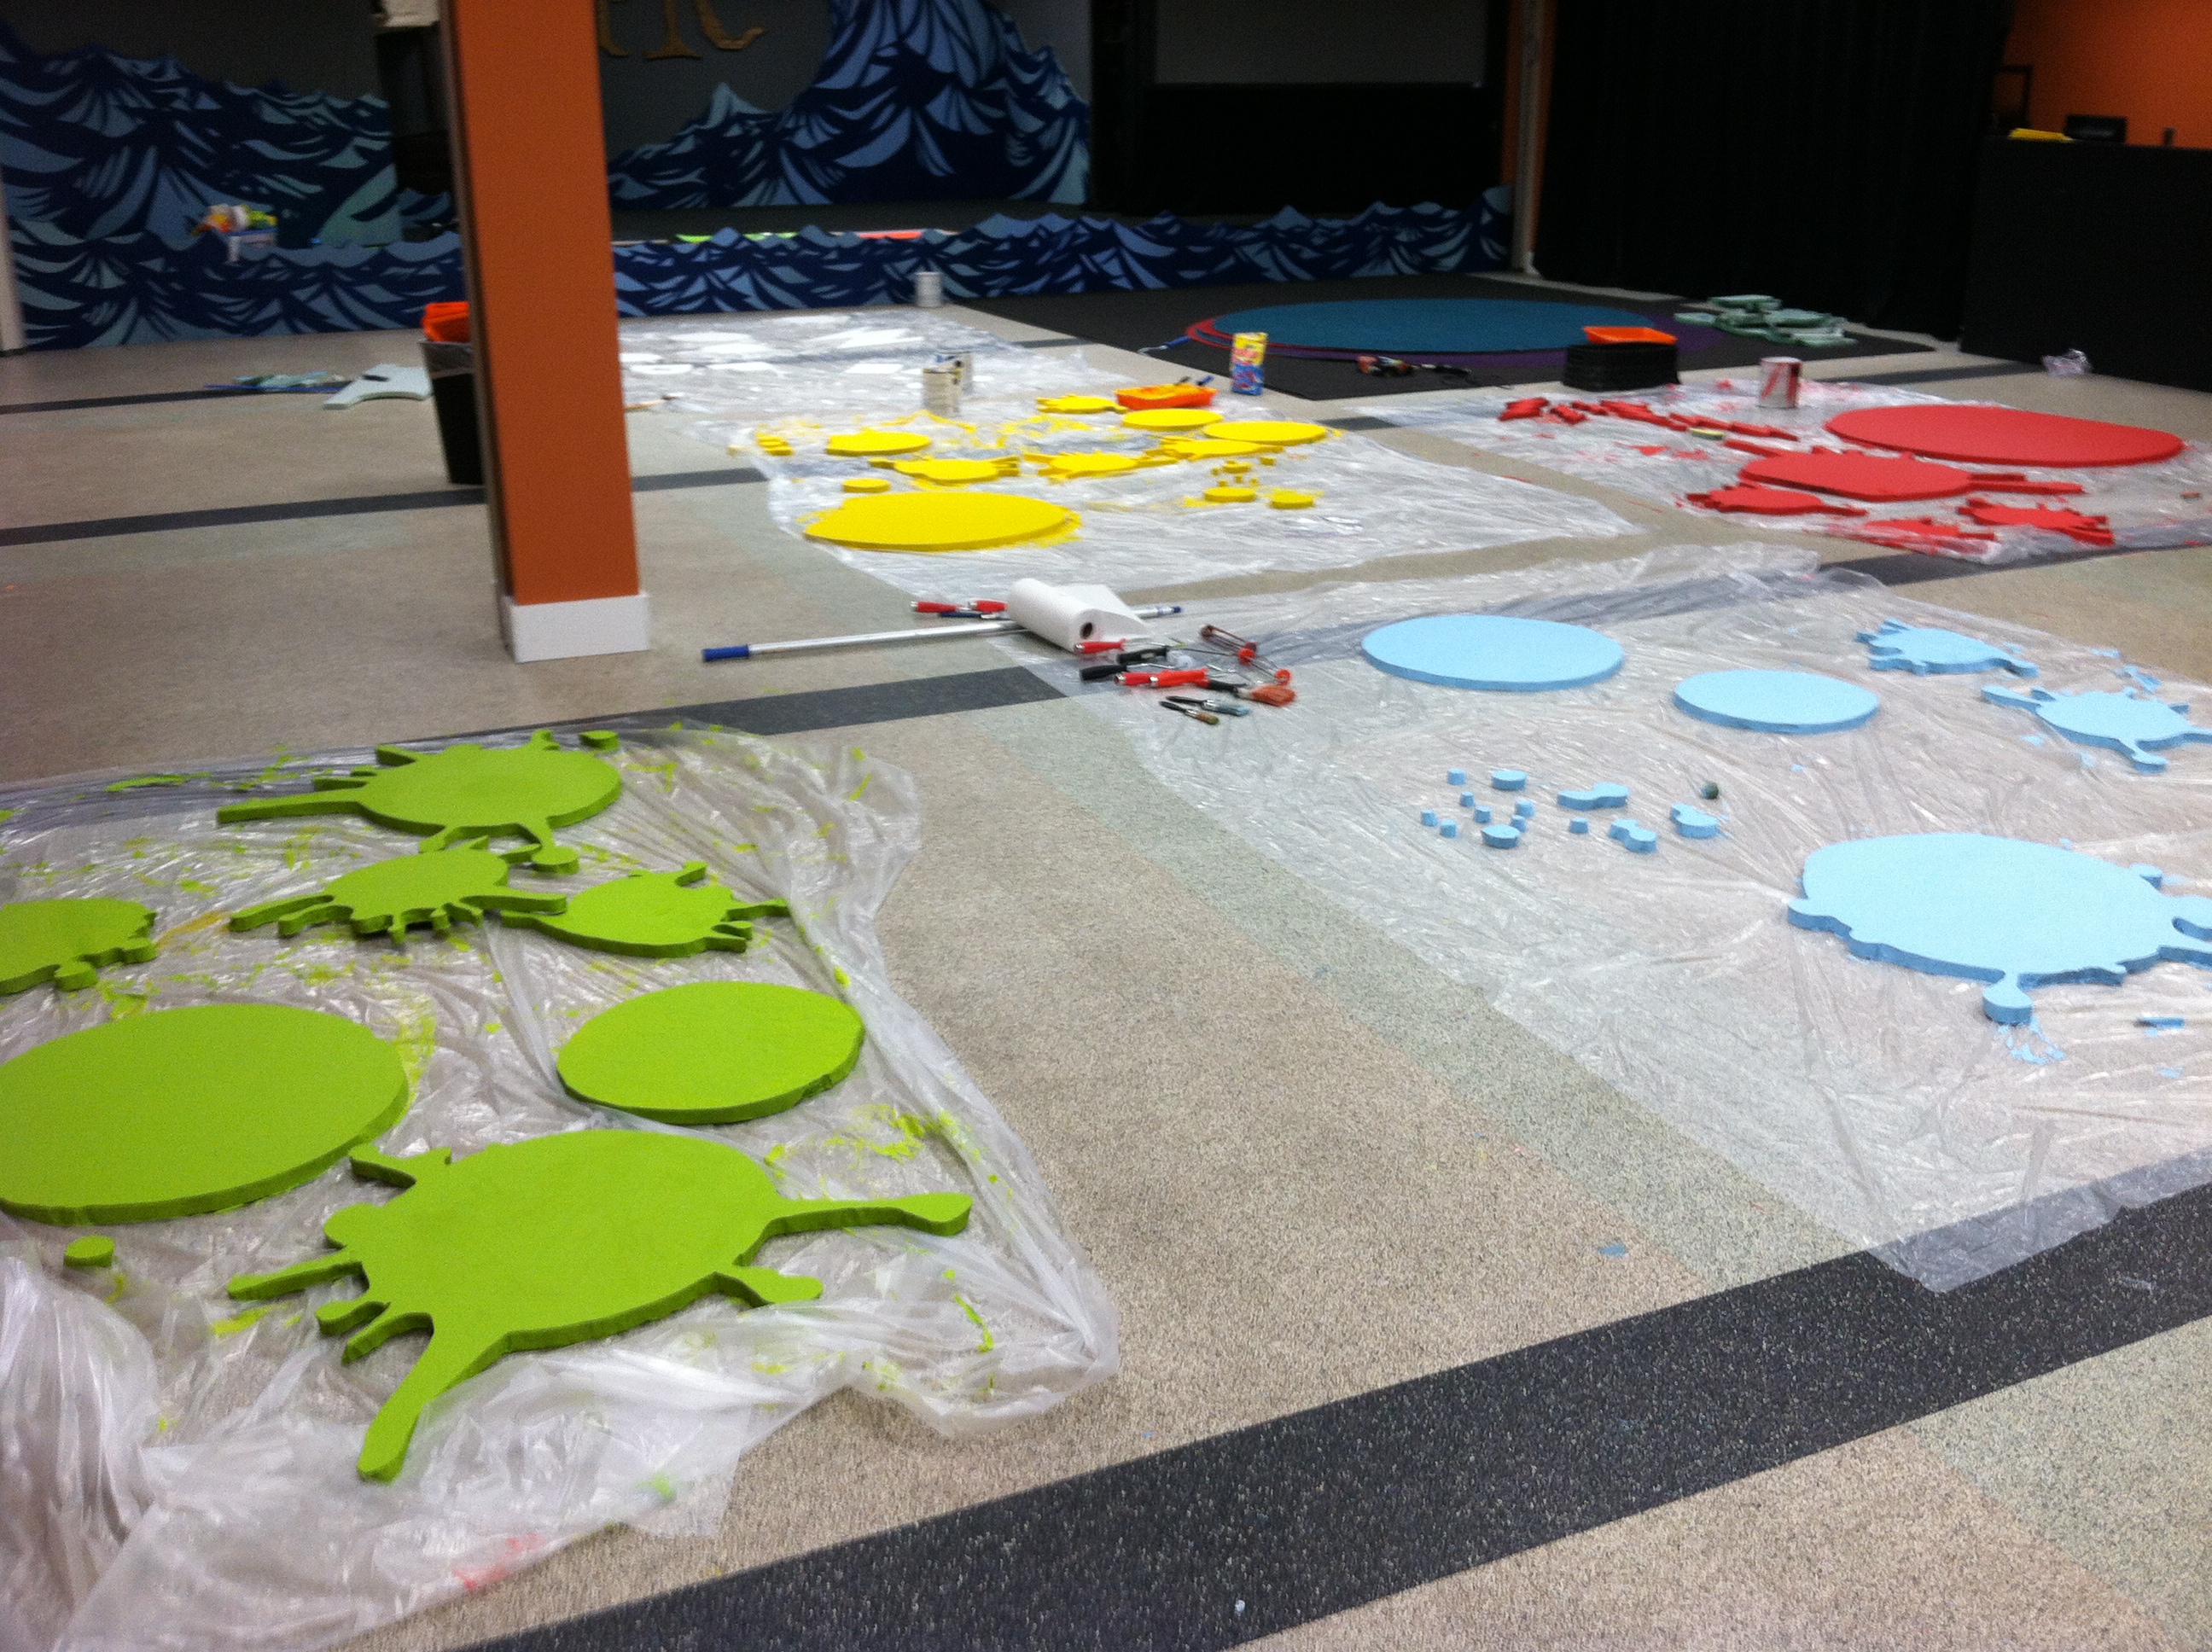 Once we have the image for our design as large as we want it, we carve it and then paint it to make it come to life. We use the cheapest kind of flat paint from our local hardware store, as it only needs to cover insulation foam. Often, one coat will do it, but for darker colors, we’ll do two coats.
Projector

 We often download images from the 252 Basics curriculum package and project them onto insulation foam. Once we get the image the size we want it, we trace it, carve it and paint it.
So, those are our top 5! How about you? Do you have any favorite tools in your arsenal? Things you just can’t work without? Let us know about them in the comment section below.
